How to Photograph Products for Amazon: A Step-by-Step Guide for 2026
How to Photograph Products for Amazon: A Step-by-Step Guide for 2026
From minimum gear to the final edit: how to set up a product shoot at home that meets Amazon's rules, with a pure white 255 background, 85% framing, and accurate color.
What this guide is for
Photographing products for Amazon doesn't take an expensive studio or a camera that costs thousands of dollars. It takes knowing what the platform asks for and applying a few simple principles of light, background, and framing. With a recent phone or a basic camera, some inexpensive gear, and this guide, you can produce listings that clear Amazon's review on the first try and go head to head with the big brands.
The goal is twofold. First, meet Amazon's technical requirements: a pure white background (RGB 255, 255, 255) on the main image, the product filling 85 percent of the frame, at least 1000 pixels of resolution for zoom, and accurate color. Second, and more important, make the product look desirable, because the main image is your ad and it decides the click.
We'll go step by step: the minimum gear you need, how to prep the product before you shoot, how to set up lighting for a clean white background, how to compose the frame, and finally how to edit and export for Amazon. By the end you'll have a repeatable workflow you can apply to your whole catalog.
A word of encouragement before you start: the first shoot is always the slowest, because you're building the set and learning. From the second one on, with your corner set up and the workflow in your hands, photographing a new product takes minutes. The time you invest up front pays for itself very quickly, and you stop depending on someone else's photos or pricey outsourced shoots for every product you launch.
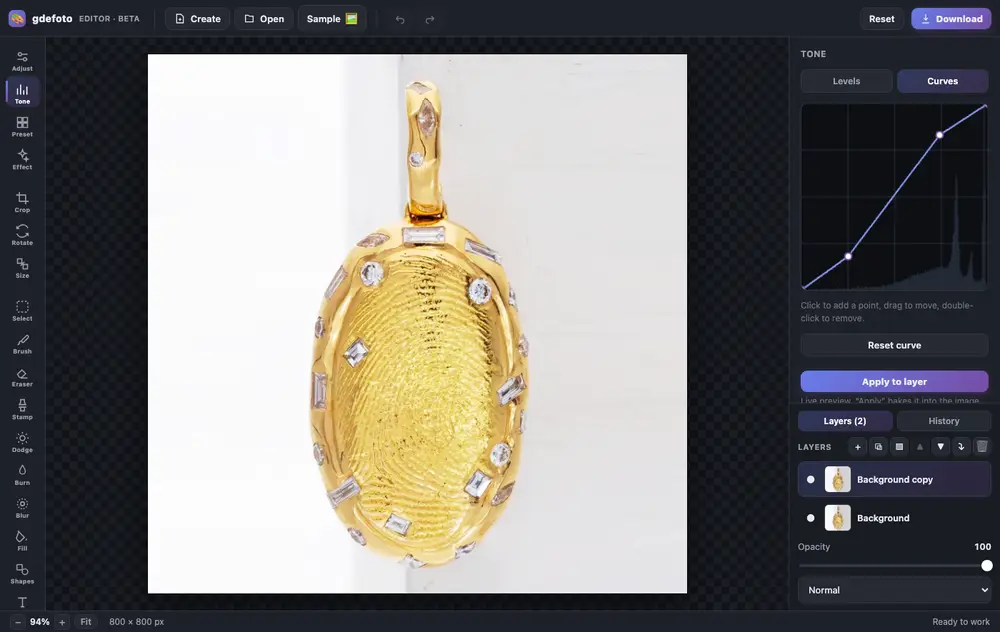
Crop, fix the light with curves, clean up with the clone stamp and add a caption. All in one tab, no install and no sign-up.
- Layers and masksBlend modes, opacity, masks painted with a brush or made from a selection.
- Light and colourLevels, curves, exposure, contrast, saturation and warmth.
- RetouchingClone stamp, dodge and burn, blur, brush and eraser. Crop, rotate and resize.
- AI built inColorize, restore, remove the background, upscale and sharpen: the result is added as a new layer.
- Text and shapesCaptions in the font you choose, rectangles and circles over the photo.
- In your browserNothing to install, no account. Full history with undo.
- Product photos: crop, brighten the background with levels, remove dust with the clone stamp.
- Old photos: restore with AI, colorize and add a caption.
- Social posts: a canvas from a size template, your shot and text on top.
Editing is free. Download is watermarked; remove the mark for $2.99.
Step 1: the minimum gear you actually need
It's tempting to think you need a lot of equipment. In reality, very little gets you professional results if you understand light. Here's the gear that makes the difference, ordered from essential to nice to have.
The essentials
- A camera or a recent phone. A mid-range or high-end phone from the last few years has more than enough sensor for Amazon. A mirrorless camera or DSLR gives you more control, but it isn't required.
- A tripod. The best value item on the list. It steadies the shot, eliminates shake, keeps the same framing from product to product, and lets you use long exposures with soft light. Phone tripods can be very cheap.
- A white background. A roll of matte white paper or a large sheet of poster board, curved to create a seamless backdrop with no horizon line. Matte keeps reflections away.
- Light. Two sources of diffused continuous light. They can be two budget softboxes, two desk lamps with diffusers, or even the light from a large window.
Nice to have
- Diffusers. White fabric or translucent panels to soften the light and get rid of hard shadows and glare.
- Reflectors. A piece of white foam board or a silver sheet to fill in the shadows on the side opposite the light.
- A lightbox. For small products, a folding lightbox with a built-in white background solves the lighting in one move, and it's cheap.
- A remote shutter or self-timer. So you don't bump the camera when you take the shot.
What you DON'T need to get started
You don't need a very expensive macro lens, a huge studio space, or professional studio lights to start selling on Amazon. Plenty of sellers spend hundreds of dollars on gear before they learn to use window light, which is free and excellent. Start with the essentials, get the workflow down, and only then invest in upgrades. The bottleneck is almost never the camera. It's lighting technique.
Phone settings that make a difference
If you're shooting with your phone, a few simple settings raise the quality a lot. Turn on the grid so you can compose precisely and keep the product centered. Lock focus and exposure by tapping and holding on the product on screen, so the camera doesn't readjust on its own between shots. Turn off the flash, which flattens the product and throws off the color. And use the highest resolution available in the camera settings.
If your phone has a pro mode or shoots RAW, turn it on for more control over white balance and more room in editing. Skip digital zoom: if you need to get closer, move the tripod or the product, because digital zoom degrades the image by stretching pixels. With these settings, a recent phone produces photos that hold their own against a dedicated camera, as long as the lighting is handled well, which is what really matters.
The tripod is your best investment
If you could buy only one thing to improve your photos, it should be a tripod, not a better camera. It steadies the shot and eliminates shake, the number one cause of slightly blurry photos that look soft in Amazon's zoom. It lets you keep exactly the same framing from product to product, which makes the whole catalog look consistent. And it makes it possible to shoot long exposures in soft light without giving up sharpness. An inexpensive phone or camera tripod transforms the quality of your photos for very little money, and it's the hardest-working accessory in the whole kit.
Do not want to fiddle with it? Hand the photo to a retoucher
Automation does not fix everything: a difficult frame, a photo that matters, an old print off a scanner. Where the algorithm gives up, a person works the picture layer by layer in Photoshop, by hand.

 BeforeAfter⇆
- Bring back sharpness in the face and eyes
- Remove noise and artefacts without plasticising the skin
- Fix colour, contrast and a broken exposure
- Remove scratches, stains and creases from an old scan
- Return a file large enough to print
- Price per photo$10
- Turnaroundwithin 24 hours
- Deliveryto your email
- If we cannot do itmoney back
We will finish your photo by hand
A studio retoucher fixes what automation cannot: sharpness, face, colour, defects. Pay first, then simply send the photo and tell us what you need. If we cannot do it, you get your money back.
- Manual photo retouching$10
Step 2: prep the product, the part 90 percent of sellers forget
The best lighting in the world won't save a dirty or badly presented product. Prep is the step that separates an amateur photo from a professional one, and it's where most sellers skip the work. Every speck of dust, every fingerprint, and every wrinkle gets magnified in Amazon's zoom.
Clean it thoroughly
- Get rid of dust with a microfiber cloth or an air blower. On glossy surfaces, dust shows up as annoying specks that you later have to retouch one at a time.
- Wipe off fingerprints from metal, glass, and glossy plastic with a cloth, and wear cotton gloves to handle the product during the shoot.
- Remove tags and stickers that aren't part of the product, like price tags or temporary barcodes.
- Iron or steam fabrics. A wrinkled garment looks low quality even when it isn't.
Presentation and setup
- Fill out the shape. A backpack, a handbag, or a garment looks much better stuffed with tissue paper so it holds its natural volume.
- Arrange the parts neatly. If the product has moving parts, cables, or accessories, lay them out cleanly and symmetrically.
- Mind the orientation. Show the product's most attractive, recognizable side in the main image, with the logo or the front visible.
Holding the product in place
To keep the product in exactly the right position, use a few discreet tricks: reusable mounting putty under the base, clear fishing line to hold pieces in the air, or a stand you'll erase later in editing. These tricks let you show the product at its best angle without it tipping over or shifting between shots.
Why prep saves hours of editing
Every minute you spend cleaning and positioning the product saves you ten minutes of retouching later. Removing dust, fingerprints, and wrinkles in editing, pixel by pixel, is slow and frustrating. Doing it right in front of the camera is fast, and the result looks more natural. In practice, prep is the highest-return phase of the whole shoot.
Surfaces and bases to set the product on
The surface the product sits on matters more than you'd think. For the main image on white, the ideal is a seamless background that curves up behind the product, with no visible horizon line, so the product seems to float in endless white. A roll of white paper or a large curved sheet of poster board gets you that effect. Avoid glossy surfaces that reflect the product and make it harder to cut out later.
For secondary lifestyle shots, on the other hand, the surface is part of the story: warm wood, stone, linen, a kitchen countertop. Keep two or three different surfaces ready so you can change the setting without hunting for one every time. A handy trick is to use vinyl backdrops or lightweight boards that imitate real materials. They're cheap and easy to store, and they give you a library of lifestyle backgrounds without taking up space or costing much.
The small tricks of product styling
Product styling is the art of showing an object at its very best, and it comes down to small details that make a big difference. Stuffing a garment or a bag with tissue paper so it holds its shape. Using clear fishing line or mounting putty to hold pieces in the perfect position. Lining up cables and accessories symmetrically. Turning the logo toward the camera. These touches take almost no time, yet they make an ordinary product look cared for and desirable. Leave them out and the photo falls flat, even when the light and the background are right.
Step 3: lighting and a pure white background (RGB 255, 255, 255)
This is the technical heart of Amazon photography. The main image requires a pure white background, and getting it right in camera saves you hours of cutting out. The key is understanding that the product and the background are lit separately.
The two-lighting principle
To get a clean 255, 255, 255 white background, the background has to receive more light than the product, so it comes out overexposed and pure without blowing out the product. Two techniques:
- Light the background separately. Aim one light only at the white background, apart from the one lighting the product. That way you control each on its own.
- Separate the product from the background. Move the product about 2 to 3 feet away from the background so its shadows don't fall on the white.
How to light the product
- A diffused key light off to one side, at about forty-five degrees, with a diffuser to soften the shadows.
- A fill light or reflector on the opposite side to open up the shadows so you don't end up with hard dark areas.
- Avoid the camera's direct flash, which creates glare and flattens the product.
- Control reflections on shiny products with large diffusers that wrap the light around them.
The free alternative: a window
If you don't have lights, a large window with diffused natural light and no direct sun is an excellent studio. Set the product sideways to the window, put a white reflector on the other side for fill, and shoot. Window light is soft and natural, and it brings out texture beautifully. The only drawback is that it depends on the weather and the time of day.
Camera settings
- Low ISO (100 or 200) to avoid noise, relying on the tripod for stability.
- White balance set to match your light so the color comes out accurate. If you can, use a gray card to calibrate it.
- A mid-range aperture (around f/8) so the whole product is in focus and sharp.
- Shoot RAW if your camera allows it, for more room when you edit the white and the color.
With the background well lit and the product pulled away from it, most of the white will come out of the camera nearly pure, and you'll only need a small adjustment in editing to bring it to an exact 255.
White balance and the gray card
White balance is what makes whites come out white and colors accurate, instead of tinted yellow or blue depending on the light. The most precise way to set it is with a gray card or a white reference card: take one photo with the card in the frame under your lighting, and in editing use that reference to set the white balance for the whole shoot at once. It's a quick step that guarantees accurate, consistent color across all your photos.
If you don't have a gray card, set the white balance manually in the camera for your type of light, and avoid mixing sources with different color temperatures, like window light and a warm bulb, because that creates color casts you can't correct cleanly. One dominant light source and a well-set white balance are the foundation of accurate color, and accurate color is what cuts down on returns from products that showed up in a different shade than the photo.
Controlling reflections on shiny surfaces
Products with shiny surfaces, like electronics, glass, metal, or polished plastic, are the hardest to photograph because they reflect everything around them, including the camera and the lights. The secret is to wrap the product in broad, diffused light, using large diffusers or a light tent that surrounds the object, so the reflections are soft and even instead of hard, distracting hot spots. Position your lights so the reflections fall where they won't get in the way, and wear dark clothes if you show up in the reflection yourself. Taming reflections is what separates a professional photo of a shiny product from an amateur one.
With the shots taken, three tasks remain: composing the right framing, editing to meet the rules, and exporting in the right format. This step turns your photos into a listing that's ready to publish.
Framing at 85 percent
Amazon wants the product to fill around 85 percent of the image area in the main image. Not lost in a sea of white, and not so close to the edges that it gets cut off. Compose with a small, even margin around the product. Shoot square (1:1) or crop to square afterward, because that's the ratio that looks best in the search results grid and on mobile.
Editing, step by step
- Set the background white with a levels or curves layer, bringing the background to exactly 255, 255, 255 without blowing out the edges of the product. Check the value with the eyedropper.
- Correct the color so it matches the real product. Accurate color reduces returns.
- Clean up any remaining flaws: dust, specks, small marks that slipped through during prep.
- Crop to a square frame with the product at 85 percent.
- Apply gentle sharpening with an unsharp mask so the detail looks crisp in the zoom.
Exporting correctly
- JPEG format at high quality (around 85).
- Resolution of at least 1600 pixels on the long side for a sharp zoom, never less than 1000.
- sRGB color space so it looks the same on every screen.
- Name the files with the SKU and a sequence number to control the order of the gallery.
Automate a large catalog
If you have a lot of products, record an editing action that applies the white adjustment, the crop, the sharpening, and the export automatically, and run it in batches. Every photo comes out the same size, in the same format, with the same finish, and you save hours of repetitive work. The visual consistency of a catalog sells too, beyond the time you save.
Naming, ordering, and backing up your catalog
With a lot of products, file organization saves as many headaches as the editing itself. Name each photo with the product's SKU and a sequence number, for example the code followed by 01 for the main image, 02 for the next one, and so on. That numeric order controls the gallery sequence when you upload in bulk and keeps a detail shot from ending up as the main image by mistake. Keep each product in its own folder so nothing gets mixed up.
Always keep the untouched originals in a separate folder and work on copies, so you can redo an edit if the requirements change or you want a different version. And back up the whole photo catalog to an external drive or the cloud: reshooting a product because the files were lost is an avoidable cost. A catalog that's well named, organized, and backed up is an asset you reuse every time you launch on a new channel or update a listing.
Test your photos in the real listing
Before you call a shoot done, upload the photos to a draft listing and look at how they appear in the real Amazon setting, on both desktop and mobile. A photo that looked perfect in your editor can reveal problems once it sits in the search results grid next to the competition, or once it's enlarged with the zoom. Check that the main image stands out at small size, that the zoom looks sharp, and that the color displays accurately on the web. This final test in the real environment is what confirms your work adds up to a listing that actually sells, and not just nice photos in isolation.
Can I photograph products for Amazon with my phone?
Yes. A recent mid-range or high-end phone has more than enough sensor. What makes the difference isn't the camera. It's the lighting, the background, and the tripod.
How do I get a pure white 255, 255, 255 background?
Light the background separately from the product so it comes out overexposed, move the product away from the background, and finish in editing with a levels layer until you hit an exact 255.
Do I need expensive lights?
Not to get started. Diffused light from a large window, with no direct sun and a white reflector on the other side, produces excellent results and it's free.
What aspect ratio should the photo be?
Square 1:1 is the safest, with the product filling around 85 percent of the frame. It's the one that looks best in the grid and on mobile.
Why is cleaning the product so important?
Because Amazon's zoom magnifies every speck of dust, fingerprint, and wrinkle. Cleaning well before you shoot saves hours of retouching and gives a more natural finish.
How many photos should I take per product?
At least seven for a complete listing: main image, alternate views, detail, scale, in use, infographic, and what's in the box. The more questions you answer, the better it converts.
Should I shoot RAW?
If your camera allows it, yes. RAW gives you more room to adjust the white and the color in editing without losing quality. On a phone, shoot at the highest quality available.
How do I avoid reflections on shiny products?
Use large, diffused light that wraps around the product, and avoid direct flash. Diffusers soften the sources and get rid of distracting hot spots.
What resolution should I export at?
At least 1600 pixels on the long side for a sharp zoom, and never less than 1000, which is the threshold for Amazon to turn on zoom.
Is it worth automating the editing?
With a large catalog, very much so. An action that adjusts the white, crops, sharpens, and exports in batches saves hours and guarantees every listing comes out identical.
How long does it take to photograph a product once the set is built?
Very little. The first shoot is slow because you're setting up your corner and learning the workflow, but from then on a new product takes minutes, which is why the upfront time pays for itself so fast.
Should I test the photos in the listing before I call them done?
Yes. Upload them to a draft and look at how they appear on the web and on mobile, next to the competition and with the zoom. A photo that's perfect in your editor can reveal problems in the real Amazon setting.

With this guide you can set up an Amazon photography workflow at home that follows the rules and sells: minimum gear, a well-prepped product, a pure white 255, 255, 255 background, framing at 85 percent, and clean editing. It's manageable work with a strong payoff. But there comes a point, with large catalogs or products that are hard to light, when time and a professional eye make the difference. At the gdefoto studio we prepare Amazon-ready product photography: pure white background, cropped to the right framing, accurate color, infographics, and complete galleries that clear Amazon's review on the first try. Learn the workflow yourself and, when the volume gets to be too much, leave the heavy lifting to us so your catalog goes out flawless and on time.
We will edit a sample from your catalog for free
For online stores, manufacturers, brands and wholesale suppliers. Send 1-3 product photos and we will return them professionally edited, with a price quote for your whole catalog.
This is a b2b, volume format. We do not process personal photos (portraits, events, documents) here.
Request received
We will edit your sample and send the result with a catalog quote within one business day.