How to Photograph Jewelry with Your Phone at Home: Earrings, Chains, Costume Jewelry
How to Photograph Jewelry with Your Phone at Home: Earrings, Chains, Costume Jewelry
A home studio for jewelry photos and phone camera settings
To take good pictures of jewelry with a phone at home you need three things: soft light from a window, a phone that does not move, and a clean piece on a calm background. An expensive camera and a studio decide very little here. Earrings, a chain or a brooch take up a few centimeters of the frame, and everything that ruins the shot happens within those few centimeters: a harsh highlight, shaky hands, a fingerprint on the metal, a yellow cast from a lamp.
Below is the order in which a maker or a small shop can set up a shooting corner on a windowsill, adjust the phone camera and get pictures for social media, listings and their own website. The guide moves from light to editing: first the things that cannot be fixed later, then the things that can.
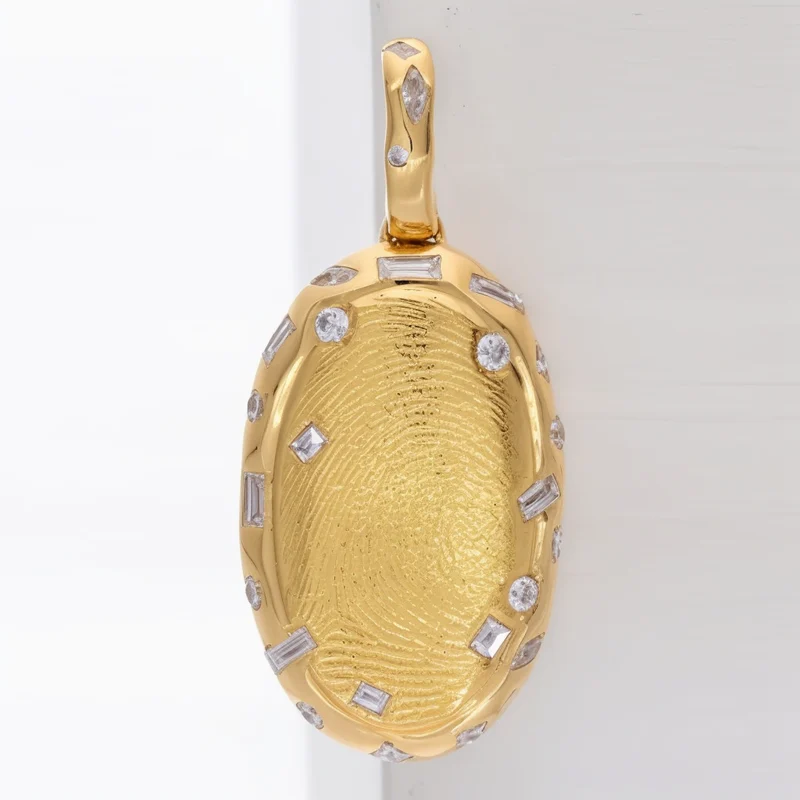
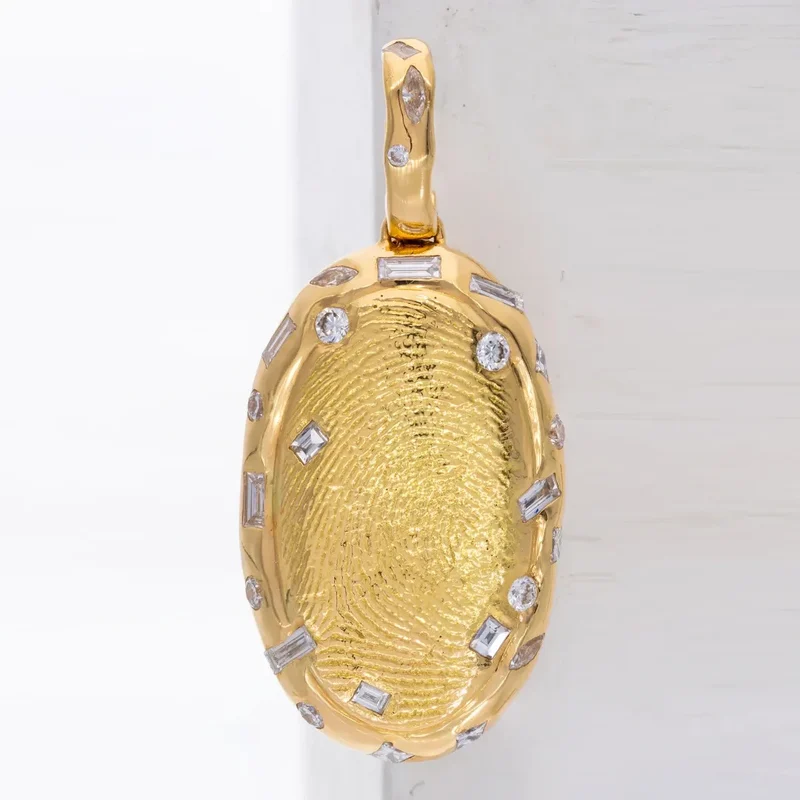
How to photograph jewelry at home: what you need besides a phone
What you already have in the apartment is enough. The list is short, and you will hardly need to buy anything on it:
- a window with no direct sun coming through it, or any window on an overcast day;
- a table or a wide windowsill next to that window;
- two sheets of thick white paper: one as the background, the other as a reflector;
- tracing paper, thin white fabric or baking parchment to soften the light;
- a support for the phone: a tripod, a stack of books, a mug;
- a microfiber cloth, a soft brush and an air blower for dust;
- tweezers and thin gloves so you do not leave fingerprints on the metal.
The last two items look like a trifle, but they are the ones that save the most time. A speck of dust on a cabochon or a finger mark on a smooth ear wire is invisible on the phone screen, yet in the finished picture it is the first thing that catches the eye.
How to photograph jewelry by a window: light and a diffuser
Place the table side-on to the window so that the light falls on the piece from the side and slightly from above, not head-on and not from behind. Side light draws volume: a bead gets its roundness, metal gets a transition from light to dark, a textured surface gets relief. Light from the front makes jewelry look flat, and backlight turns it into a dark silhouette.
Direct sun is almost always the enemy of jewelry. It gives hard black shadows and burned-out white patches on the metal with no detail left in them. If the sun does reach the table, cover the glass with tracing paper, baking parchment or thin white fabric. You get one large soft light source: the shadows become transparent, and the highlights on the metal turn from dots into even bright bands.
And the main rule: one light source only. Turn off the ceiling light and the desk lamp while you shoot by the window. Daylight is cool, a lamp is warm, and when they mix, one side of the piece goes blue and the other goes yellow. A frame like that is hard to bring back to normal color afterwards.
A white sheet as a reflector: how to lift the dark side of the piece
Stand a sheet of white paper or a piece of foam board on the side that the window light does not reach, right up against the edge of the frame. It bounces part of the light back onto the shadow side, and the jewelry stops sinking into black on one flank. Move the sheet closer and further away and watch the screen: the difference shows at once.
For metal a reflector matters twice as much. A polished surface works like a mirror and shows everything that stands around it: a dark wardrobe, a patterned curtain, your hands. The more white planes there are around the piece, the cleaner and brighter the metal looks. Sometimes it is enough to lay a second sheet on top at an angle, and silver goes from gray to light.
The opposite trick is useful too. If a smooth ring or a ball comes out completely white and loses its shape, hold a strip of dark card next to it. A dark line appears in the metal, and the object looks three-dimensional again.
A light box for jewelry photos: buy one or build it yourself
You need a light box when you shoot many pieces of the same kind and want the same result at any time of day. It is a box with white walls that scatter light from every side, so the room is not reflected in the metal. A small box is enough for small jewelry, and you can build one from a cardboard carton: cut windows in the side walls and the lid, cover them with tracing paper, and put a curved sheet of white paper inside with no crease. Step-by-step assembly with dimensions is in the article on a DIY light box for product photography.
A light box has a downside as well. The light in it is so even that metal sometimes looks flat and stones look dull. The cure is simple: open one wall a little or take the diffuser off one side so that you get directional light and a faint shadow. For shots on a textured background for social media you usually do not need a box at all, a window is enough.
What to use instead of a tripod for small jewelry
Any support that does not move. Up close the slightest hand movement gives blur, and in window light the phone picks a fairly slow shutter speed, so shooting jewelry handheld is always a lottery. The simplest substitutes:
- a stack of books with the phone leaning against it and held in place from the side by something heavy;
- a mug or a glass with the phone standing upright in it;
- for shooting from above: two equal stacks of books with a ruler or a small board between them, the phone lying on it with the camera over the piece.
It is best to release the shutter so that nobody is touching the phone at the moment of the shot: with the timer or a wireless remote. On an iPhone the timer is in the camera controls menu: tap Timer, then choose 3s, 5s or 10s, which is the delay in seconds. Three seconds are enough for the phone to settle after the tap.
How to photograph jewelry with an iPhone: macro, focus and exposure
On an iPhone, tap the screen on the part of the piece that has to be sharp: the camera moves the focus there. Next to the focus box a small icon appears that you can drag up and down: this changes the exposure, that is, the brightness of the frame. On a white background the phone usually darkens the picture and the background comes out gray, so you almost always have to raise the brightness a little.
To keep the settings from drifting between frames, touch and hold the spot you need until you see "AE/AF Lock". After that you can swap pieces in the same place, and the whole series will come out with the same brightness. Tapping the screen removes the lock.
On models with macro photography the camera switches to the Ultra Wide lens by itself when you bring the phone right up to the subject: according to Apple's user guide, you can shoot from as close as 2 centimeters. This is handy for details: clasps, hallmarks, the texture of beadwork. But a phone standing that close blocks the light and is reflected in the metal. If the frame has gone dark or you can see the camera in the earring, move back and turn off automatic switching: when the phone gets within macro distance, a macro button appears on the screen, a tap on it stops the switch to the Ultra Wide lens, and a second tap turns it back on. Whether this button is shown depends on the Macro Control option in the Camera section of the Settings app: if the button is missing, check that the option is on. The same camera settings contain Grid and Level: with them it is easier to hold the phone exactly above the table and keep the horizon straight.
Android phone camera settings: no zoom and no flash
The principle is the same as on an iPhone: you set focus by tapping the piece on the screen, and then adjust brightness with the control next to the focus point. Samsung's help pages for Galaxy phones describe it in the same terms: tap the main subject on the screen so the camera focuses on it, and correct the brightness with the slider next to the focus point. The same pages give the tip people forget most often: wipe the lenses with a clean soft cloth before you shoot. Other manufacturers and software versions name the menu items differently, so look for the functions rather than the words: tap to focus, brightness correction, timer, grid, and, if there is a manual mode, white balance.
Two bans are the same for any phone. The first: do not use digital zoom. Pinching out beyond the optical range does not bring the lens closer, it just enlarges the picture and throws away detail: the stronger the zoom, the lower the quality. It is better to shoot from a comfortable distance with the main camera and crop the frame afterwards: the result will be the same or better. If the phone has a separate telephoto lens, you can use it: it is optical, and it also lets you step back from the piece and stay out of the light.
The second ban is the flash. Head-on light from a hand's width away gives a white patch on the metal, a flat picture and a hard shadow behind the piece. Set the flash to "off" rather than "auto", otherwise on an overcast day it will fire by itself.
How shooting for social media and listings differs from shooting for a marketplace
A marketplace dictates the rules: background, aspect ratio, size, the order of pictures in the listing. A maker who sells through social media, messaging apps, classified ads or their own website has more freedom: what matters to them is a recognizable style, a mood and an honest picture of something made by hand. That is why this guide is about light, presentation and editing rather than the technical requirements of platforms.
If you are moving onto the big platforms at the same time, the requirements for product listings and the order of pictures are covered separately, in the piece on jewelry photography for marketplaces. The shooting corner stays exactly the same: the window, the reflector and the phone support work for both jobs.
How to photograph earrings, chains, bracelets and costume jewelry
Every kind of jewelry has its own difficulty. Earrings refuse to lie the same way, a chain tangles and loses its shape, a bracelet tips over, and clear resin catches the reflection of the whole room. The light and the support stay as they were, the only thing that changes is how you lay the piece down or hang it.
How to photograph earrings: hang them, lay them flat or stand them up
Drop earrings are best hung: that way they hang as they do on the ear, and you can see their real length and movement. Studs, on the contrary, are easier to push into a base or lay flat. Methods that work:
- stretch fishing line or thin thread between two supports and hang the earrings on it, with the background set further back so that it blurs;
- pierce a sheet of thick paper or card, push the ear wires through and stand the sheet upright;
- hang the pair on the rim of a glass, a cup or a small wooden twig;
- lay the earrings on a flat surface and shoot straight down: good for flat and geometric shapes;
- for studs, use a piece of foam or dense sponge covered with paper or fabric.
Hanging earrings swing at the slightest movement of air. Let them settle and shoot with the timer, otherwise one of the pair will come out blurred.
How to photograph earrings to sell: the pair in the frame
A buyer needs three views: the whole pair, one earring close up and the fastening. Lay or hang the pair symmetrically, at the same level and at the same distance from the camera. If one earring is closer, it will look bigger and sharper while the other drifts into blur, and the pair will seem mismatched.
A turned pair works well: one earring facing the camera, the other at three quarters or side-on. Then a single frame shows the design, the thickness and how the ear wire is built. For asymmetric pairs, where the earrings are meant to differ, lay them side by side and say so in the caption so the difference does not look like a mistake.
Set the focus on the detail of the front side that is closest to the camera: a stone, the central element, the edge of the pattern. If the sharpness landed on the ear wire and the earring itself is soft, the frame has to be reshot, editing will not fix it.
How to photograph a chain without tangling it
A chain is laid out from the clasp: put the clasp down first, then guide the links with tweezers or a toothpick, straightening the twisted spots. Bare hands do a worse job: fingers block the view and leave marks. Before laying it out, run the whole length of the chain between gloved fingers so that the links settle with the same side up.
A thin chain slides on smooth paper and gathers back into a heap. What helps is a background with a slight texture (linen, velvety paper, matte card) and tiny bits of reusable adhesive putty under the links in the places where the line has to hold. Take the smallest crumbs you can and hide them under the chain so they stay out of the picture.
Shoot a chain straight from above. At an angle the far part leaves the zone of sharpness, and half of the piece comes out blurred. From above the whole chain lies in one plane and is sharp from the clasp to the pendant.
How to photograph a necklace or chain nicely: line, loop, neck
A good layout reads at a glance: the eye should grasp the shape of the piece without effort. Three proven options:
- a smooth arc or an S shape: shows the link pattern and the length, good for chains without a pendant;
- a teardrop loop, the way a chain sits on the neck, with the pendant at the lowest point: the best choice for pendants and necklaces;
- a neat spiral or several coils: for long chains and bead strands, when the piece does not fit into the frame laid out in full.
Besides the overall view, take a close-up of the links and the clasp. From the wide shot a buyer cannot tell a curb chain from a cable chain or judge how reliable the clasp is, and these are common questions in messages.
Necklaces with a complex shape and multi-strand beads lose their drape on a flat surface. They are better shown on a display bust or on a neck. A simple stand can be replaced by a firm roll of fabric or a book wrapped in linen and propped at a slant: the piece will lie in an arc, as it does on the body.
How to photograph bracelets and brooches
A rigid bracelet is stood on its edge or put on a support, a soft one is laid out in a ring or a line. A drop of adhesive putty under the lowest point is enough to stop a bangle from falling over. A soft beaded bracelet holds its shape well on a small cone rolled from paper or on a smooth stone: this shows how it wraps around a wrist.
With bracelets, always shoot the clasp and the inner side. For handmade things this matters more than it seems: buyers judge the maker's care by the reverse. If the bracelet is adjustable, show it at its shortest and at its longest setting.
A brooch is almost always flat, so its main picture is either straight from above or pinned to fabric. The second option sells better: on a lapel, a sweater or a scarf the size is clear, and so is how the brooch looks in real life. Take a separate frame of the back with the pin or the clip.
How to photograph costume jewelry with glass and seed beads
Costume jewelry with glass and seed beads is shot in the same soft side light, but you watch two things: color and highlights. Beadwork lives on color and rhythm, and a buyer will later take any shift in shade as deception. So a single light source and a neutral background are a must here: white, light gray, undyed linen.
Faceted glass beads and crystals come alive when the light is a bit more directional. If they look dull under the diffuser, shift the tracing paper so that part of the window light passes straight through, or take the reflector away: sparks will appear on the facets. Matte glass and pearl beads, on the contrary, need the softest light, otherwise every bead gets a hard white dot.
Clear glass can dissolve into a white background. In that case use a background one tone darker, light gray or beige, or put the light slightly behind and to the side so that it lights the glass from within.
How to photograph epoxy resin jewelry: glare and transparency
Resin shines like glass and is domed as well, so it reflects everything around it, including the phone and the window with its frames. The first thing to do is surround the piece with white. Sheets of paper at the sides and on top remove the stray reflections, and one clean highlight from the window is left on the surface. Do not remove the highlight completely: without it resin looks like matte plastic.
To show the transparency and what is cast inside (dried flowers, glitter, layers of paint), try backlighting. Lay the piece on a sheet of tracing paper or frosted glass raised above the table so that the window light passes underneath it too. The second option is simpler: stand the pendant upright between the window and the camera and light it from the front with a white sheet.
Dust, lint and fingerprints are especially visible on glossy resin. Wipe the piece with microfiber and blow it off right before the shot, not five minutes earlier: dust settles fast.
How to photograph handmade jewelry: what to show the buyer
With handmade jewelry people buy not only the object but also the maker's work, so the series has to include frames that factory pieces do not have: texture, tool marks, the reverse side, the fittings. A minimum set for one piece looks like this:
- an overall view on a clean background, the whole piece;
- a close-up of the main detail;
- the clasp, the ear wire or the pin;
- the reverse side;
- the piece on a person or next to a familiar object for scale;
- a mood shot on a textured background for the feed.
Close-ups of really tiny details call for a separate approach to focus and depth of field. It is described in detail in the article on macro photography of small products and jewelry.
Do not want to fiddle with it? Hand the photo to a retoucher
Automation does not fix everything: a difficult frame, a photo that matters, an old print off a scanner. Where the algorithm gives up, a person works the picture layer by layer in Photoshop, by hand.
BeforeAfter⇆- Bring back sharpness in the face and eyes
- Remove noise and artefacts without plasticising the skin
- Fix colour, contrast and a broken exposure
- Remove scratches, stains and creases from an old scan
- Return a file large enough to print
- Price per photo$10
- Turnaroundwithin 24 hours
- Deliveryto your email
- If we cannot do itmoney back
We will finish your photo by hand
A studio retoucher fixes what automation cannot: sharpness, face, colour, defects. Pay first, then simply send the photo and tell us what you need. If we cannot do it, you get your money back.
- Manual photo retouching$10
Background and presentation: white background, textures, jewelry on yourself
Background and presentation decide where a frame will go. The same pendant on a white sheet looks like an item in a catalog, and on a piece of old wood it looks like a story you want to study. It is better to have both versions and not to mix up their jobs.
How to photograph jewelry on a white background
A white background is made from a single sheet of thick matte paper curved in a gentle sweep: the lower part lies on the table, the upper part leans against a wall or a box. There must be no crease, then no horizon line appears behind the piece. The paper has to be matte: glossy paper gives highlights of its own and reflects the piece.
The main trouble with a white background is that in the picture it comes out gray or bluish. The cause is the automatics: the camera sees a lot of white and darkens the frame. This is fixed while shooting: raise the brightness with the control at the focus point until the background turns light but the piece has not yet started to lose detail in the bright areas. Silver and pearls are the first to vanish on an overexposed background, so keep an eye on them.
A light soft shadow under the piece does not need to be removed. It sets the jewelry on the surface, and without it the object seems to hang in the air. Only hard black shadows and double shadows from two light sources are bad.
How to photograph jewelry for an online store: a consistent catalog
For a catalog, sameness matters most. When every piece has the same background, the same shooting angle and the same scale, the storefront looks put together, and the buyer compares the jewelry, not the photographs. Getting there is easier than it seems: set the light and the support once, mark the position of the phone and the background on the table with bits of masking tape, and shoot the whole batch without moving anything.
Decide in advance which views every item will have and stick to the list: for example, overall view, close-up, clasp, on a person. Then the product pages will all be built the same way. Leave spare room around the piece when you shoot: you can crop to a square or a vertical later, but you cannot paint in an edge that never made it into the frame.
General techniques of product photography at home, from choosing a spot to working through a batch of goods, are collected in the article on how to photograph products at home with a phone.
How to photograph jewelry on a textured background: stone, wood, linen, paper
A textured background is chosen by contrast with the piece: smooth goes on rough, shiny on matte, light on dark. Then the jewelry stays the main thing and the background works for it. A few reliable pairings:
- stone, concrete, ceramic tile: for silver, steel, minimalist shapes;
- wood and wood slices: for warm metals, leather, natural stones, ethnic pieces;
- linen and undyed cotton: for seed beads, pearls, resin with dried flowers;
- thick colored or kraft paper: for bright costume jewelry and graphic shots.
The test is simple: squint and look at the screen. If the piece is what you see first, the background is right. If your eye snags on the veins of the marble or the pattern of the fabric, the background is arguing with the jewelry and has to be swapped for a calmer one.
Beware of brightly colored surfaces near metal. A red napkin or a green wall is reflected in silver and tints it, and a colored background puts a cast on light stones and pearls.
How to take beautiful jewelry photos with props without clutter
A prop has to explain something: the material, the mood, the occasion, the scale. A sprig of dried flowers next to a resin pendant with the same flower inside belongs there, a random coffee cup next to earrings does not. The rule that saves you from clutter: no more than two or three objects besides the jewelry itself, and all of them less noticeable than it is.
Place props at the edges and partly outside the frame, and leave the brightest and sharpest spot to the piece. Things from the workshop work well: a coil of wire, a scatter of beads, a tool. They show that the piece was made by hand and cost you nothing.
Packaging is a prop too. A little box, a pouch or a tag with the workshop's name in the frame answers the question of how the jewelry will arrive, and makes the photo fit for gift roundups.
How to photograph jewelry on yourself
Jewelry on yourself is shot by the same window, standing side-on to it, with the phone on a support and with the main camera, not the front one. The main camera gives a better picture. To see the frame, put a mirror opposite or take a test shot, look at it and adjust your position. Shutter release: a 10-second timer or a remote.
A few things that make such pictures look tidy:
- earrings: hair tucked behind the ear or tied back, head turned three quarters, with the ear, the cheekbone and the line of the neck in the frame;
- necklace and pendant: plain clothing with a simple neckline, no prints or lettering, the frame from the chin to the chest;
- bracelet and ring: the hand is relaxed and busy with something, for example holding a cup or resting on fabric; neat nails without bright polish, unless it is part of the look;
- skin without an oily shine: it is easy to mistake for a flaw in the piece.
Set the focus on the jewelry, not the face: out of habit the phone looks for eyes. Tap the piece on the screen before the shot or lock the focus in advance at the right distance.
Photographing jewelry on a model: consent and preparation
You may publish photos of jewelry on another person only with their consent, and it is better to get it in writing, at least in a chat. This applies both to a friend and to a customer who sent a picture with her review: first ask whether you may put the photo in your feed or on your site, and only then publish. Other people's jewelry pictures from the internet must not be used for your own storefront.
If the person does not want to show their face, crop tighter: ear and neck, collarbones, a hand. For jewelry this is even better, because the attention stays on the piece. Agree on clothing beforehand: two or three plain tops in neutral colors cover almost any shoot.
How to show the size of jewelry in a photo
Size is shown by comparison with something a person knows by touch: a hand, an ear, a neck, a coin, a ruler. Without that a close-up misleads: an earring two centimeters long and one six centimeters long look identical in a macro shot, and the buyer is surprised later. One frame on a person or in the palm of a hand is enough to settle the question.
Write the exact figures in the description anyway: the length of the earring with the ear wire, the length of the chain, the diameter of the bracelet, the size of the pendant. A photo with a ruler is honest but ugly, so it goes last in the series, not on the cover.
How to photograph jewelry for Instagram: a consistent feed
A feed looks whole when three things repeat in it: the light, the set of backgrounds and the editing. Pick two or three backgrounds that suit your pieces and alternate only those. Shoot at the same time of day by the same window. Edit every frame the same way: the same background brightness, the same shade of white.
Alternate the types of shots so the feed does not turn into a catalog: the piece on a background, a close detail, the jewelry on a person, work in progress, packaging. And shoot with spare room at the edges from the start, because one frame will be needed in different aspect ratios: square and vertical for the feed, a narrow vertical for stories, horizontal for the header of a page or a website. A frame shot edge to edge cannot be cropped to all of these formats.
Editing jewelry photos and common mistakes
Editing jewelry is not about filters. Its job is more modest: to remove what the camera and the dust added, and to give the piece back the look you see with your own eyes. A good original looks more expensive after editing, a bad one stays bad, so first pick the sharpest frames and work only with those.
How to edit jewelry photos on a phone: the order of steps
The order matters because each step relies on the one before it. A convenient sequence is this:
- Selection. Zoom in on every frame on the screen and keep only those where the main detail is sharp.
- Cropping and straightening: remove the extra margins, correct the tilt.
- White balance and brightness: a background with no yellow or blue cast, a piece with no blocked-up shadows.
- Cleanup: dust specks, lint, stray scratches on the background.
- Background: whiten it or cut it out if you need a catalog shot.
- Metal: edges, highlights, surface texture.
- Final size for the platform and saving.
The first three steps are done in the built-in gallery editor of any phone. Cleaning up dust takes an editor with a spot retouching tool: some phones have it built in, on others you will have to install a separate app. Saturation and sharpening "by eye" are best left alone or touched only slightly: overcooked stone colors and halos around the links give the editing away at once.
What online jewelry retouching does and what stays yours
Jewelry Retouch online works on top of your frame and tidies up the metal: it makes the edges cleaner, the highlights more even and the surface texture more visible. There is one mode, a gentle one, and the widget has no switches or sliders: you upload a photo, press the button and get the result. Processing runs on the server and takes a noticeable amount of time: wait for the result and do not close the page. If the server is busy with someone else's picture at that moment, the widget will ask you to try again in a minute.
What stays yours: the shape of the piece, the stones and the color. The tool does not redraw the jewelry, does not add fire to the stones, does not turn a matte surface into a mirror and does not change the shade of the metal. For a maker this is a plus: the photo still shows exactly the thing the buyer will receive.
It is better to know in advance what retouching cannot do:
- it does not rescue a blurred or out-of-focus frame: it can only bring out texture that was actually captured;
- it does not correct white balance: a picture that is yellow from a lamp will stay yellow, so fix the color before uploading;
- it does not remove the background or clean up the props around the piece;
- it does not enlarge the picture: the result is meant for screens, with the long side up to 1024 pixels, and this applies to the paid clean file too; for large prints that is not enough.
Which files the tool accepts and what you get
The tool accepts one file at a time in JPG, PNG or WebP format, up to 25 MB, with sides from 100 to 8000 pixels. Pictures in HEIC, the format an iPhone saves photos in by default, are not accepted: before uploading, convert the frame to JPG or switch the capture format in the iPhone camera settings: the Formats section, the Most Compatible option, after which new pictures are saved as JPEG. No registration is needed.
The result comes as a PNG: the format was chosen so that a piece cut out beforehand keeps its transparent background. Without paying you see a preview: a JPEG image reduced to 900 pixels on the long side, with a watermark across the whole picture. A transparent background is shown as light in the preview. It is a convenient way to judge whether the result suits you. The clean file without the watermark, with the long side up to 1024 pixels, is paid; you can collect it within 24 hours after processing, so do not put it off.
There are 5 free runs per day from one address, and the count is shared: it includes runs of jewelry retouching, background removal and the other tools on the site where the server processes the picture. Simple converters, compression and cropping do not count toward it. When the limit is used up, a new run does not start: the widget says that the free limit for today is over and offers either to come back tomorrow or to buy a paid pack of runs. With a pack the daily ceiling of 5 runs is lifted, and only the tool's own limit remains: 40 runs per day and no more than 6 per minute.
A practical tip: do not waste attempts. Every file you send counts, including a failed one, for example in an unsuitable format. First choose the best picture of the piece, convert it to JPG, fix the color and the crop, and send only that one for retouching.
How to remove the background from a jewelry photo and make it white
There are two ways. The first: whiten the background with brightness. If you shot on white paper and the background came out light gray, raise the highlights and the exposure in the editor until the paper turns white, and make sure silver and pearls do not merge with it. This is quick and keeps the natural shadow under the piece.
The second way: cut the piece out completely. The background removal tool separates the jewelry from what it lies on, after which you can place it on pure white or any other background. The result of the cutout is a PNG with a transparent background. It is also handy to send on for metal retouching: the retouch widget itself advises giving it a cut-out piece on a light background. Keep in mind that the cutout and the retouch draw on the same daily count of free runs.
Automatic cutout copes worst with thin chains, openwork filigree and clear stones: the gaps between links may keep scraps of the old background, and transparent parts may partly disappear. For pieces like these it is better to shoot on white from the very start and take the first way.
Editing jewelry photos in Photoshop: what is done by hand
In Photoshop jewelry is edited in the same order, only each step is more precise and sits on its own layer, so it can be toned down or undone. First the color is set to neutral using the white background, then dust and small flaws are removed: the Spot Healing Brush handles specks and lint, and the Clone Stamp handles areas where texture has to be carried over precisely from a neighboring spot. Then the piece is cut out and the metal is worked on separately: highlights are evened out, contrast on the edges is strengthened, colored reflections of the room are muted. In the free GIMP the same work is done with the Heal and Clone tools.
Manual editing gives full control, but one piece takes noticeably more time, and it requires skill. So makers often split the work: automatic retouching for the whole batch, and manual work only for cover shots and the most expensive pieces. Where that line runs for fine jewelry and what exactly is finished by hand is covered in the piece on jewelry photography for marketplaces mentioned above.
If the frame is meant for a catalog, run it through Jewelry Retouch before the final downsizing for the platform, not after: some of the crispness is lost again when a picture is reduced.
Why jewelry looks yellow or gray in photos
A lamp makes jewelry yellow, and too little light or an error of the automatics makes it gray. An ordinary household lamp gives warm light, and the phone does not always compensate for it: the white background drifts toward yellow, and silver looks like brass. The most reliable option is to shoot in the daytime by a window with the overhead light off. If you have to shoot in the evening, use one lamp with neutral white light and a diffuser, and turn the other light sources off.
A gray background and dull metal on a white sheet are fixed by the brightness correction while shooting, which was described above. And grayness of the metal itself most often means that a dark room is reflected in it. Add white sheets around the piece, and the metal will brighten with no editing at all.
Why the phone and your hands are reflected in the metal
Because polished metal and a smooth stone work like a convex mirror and "see" everything in front of them. The closer the phone is to the piece, the bigger its reflection. There are three ways to fight this, and it is best to use them together:
- move the phone back and crop the frame later, or shoot with the telephoto lens if there is one;
- shift the camera slightly off axis so that the dark rectangle leaves the front surface;
- cover the phone with a sheet of white paper with a hole for the lens: the metal will reflect a white field with a small dot.
Hands are taken care of by the timer: you press the shutter, move your hands out of the reflection zone, and the camera fires by itself. Bright clothing is better swapped for white or gray while you shoot: a red sweater shows up perfectly in a silver earring.
Mistake checklist: blur, dust, busy background
Before you pack up the shooting corner, go through the list. Each of these mistakes is easy to fix on the spot and hard or impossible to fix later.
| What is wrong | Where it comes from | How to fix it |
|---|---|---|
| Yellow or multicolored frame | A lamp, or a lamp mixed with window light | One light source, daytime by a window |
| Piece not sharp | Shooting handheld, focus in the wrong place, phone too close | Support, timer, tap on the main detail, move back |
| Phone or hands in the metal | Camera right up close, shutter pressed with a finger | Step back, white sheet with a hole, timer |
| Dust, lint, fingerprints | Piece not wiped before the shot | Microfiber, air blower, gloves, tweezers |
| White patches with no detail | Direct sun or flash | Diffuser, flash turned off |
| Gray background instead of white | The automatics darkened the frame | Raise the brightness while shooting |
| Piece gets lost | Busy background, too many props | Calm background, two or three objects at most |
And one last check: open the picture on a computer screen or at least zoom in on the phone as far as it goes. Everything you can see when zoomed in, the buyer will see too when they study your piece.
Frequently asked questions
Can you take good jewelry photos with an ordinary phone and no macro lens? Yes. Shoot with the main camera from a comfortable distance, on a support and with the timer, and crop the frame afterwards. Window light and a phone that does not move affect the result more than the phone model does.
What is the best lighting for jewelry photography at home? Daylight from a window at the side, softened with tracing paper or thin white fabric, plus a white sheet on the shadow side. Turn off the ceiling light and lamps while you shoot so that warm and cool light do not mix.
Do you need a light box for jewelry photos? It is handy when you have many pieces and need the same result at any time of day. For a few pieces and for shots on a textured background, a window, a diffuser and a sheet of paper are enough.
How do you photograph earrings so the pair looks the same? Hang or lay them at the same level and at the same distance from the camera, let the drops settle and shoot with the timer. Set the focus by tapping a detail on the front side.
How do you photograph a chain so it does not tangle? Lay it out from the clasp with tweezers or a toothpick on a background with a slight texture and shoot straight from above: that way the whole chain lies in one plane and stays sharp.
What does online jewelry retouching do? It works on the metal in your frame: cleaner edges, more even highlights, more visible texture. The tool does not change the shape of the piece, the stones or the color, does not rescue a blurred picture and does not remove the background.
Which files can you upload for retouching and how much does it cost? JPG, PNG or WebP up to 25 MB, one file at a time; HEIC is not accepted. Free: 5 runs per day from one address (the count is shared with the site's other server-side tools) and a preview up to 900 pixels with a watermark. The clean file without the watermark, up to 1024 pixels on the long side, is paid.
Can you post photos of your jewelry on a customer or a friend? Only with her consent, preferably in writing, at least in a chat. If the person does not want to show their face, crop tighter: ear, neck, collarbones or a hand.
We will edit a sample from your catalog for free
For online stores, manufacturers, brands and wholesale suppliers. Send 1-3 product photos and we will return them professionally edited, with a price quote for your whole catalog.
This is a b2b, volume format. We do not process personal photos (portraits, events, documents) here.
Request received
We will edit your sample and send the result with a catalog quote within one business day.