How to Take a Passport Photo at Home With Your Phone: Step-by-Step Guide
How to Take a Passport Photo at Home With Your Phone: Step-by-Step Guide
What You Need to Take a Passport Photo at Home: Spot, Background and Light
Yes, you can take a passport or ID photo at home with your phone. You need four things: even light from a window, a white or light plain background, the main camera at eye level from about 1.5-2 metres (5-6 feet) away, and no retouching of the face. After that the picture is cropped to the size your document requires, and you either save the file or print several copies on one 4x6 inch (10x15 cm) sheet.
Before you start, check whether you need your own photo at all. For many biometric passports and driving licences you are photographed at the appointment, and a picture uploaded to an online application may only go into your application file, not onto the document itself. The third section covers this in detail. Here we go in order: the spot, the light, iPhone and Android settings, requirements, cropping and printing.
What you need
No special equipment is required. The things found in almost any home are enough.
- A phone with a working main (rear) camera. The age of the model hardly matters: a document photo is a small frame, and the resolution is more than sufficient.
- A window that lets in daylight. Official photo guides give the same advice: good lighting, preferably natural daylight.
- A light wall, a door or a bed sheet with no pattern.
- A helper to press the button. If nobody is around, a tripod or a stack of books on a shelf plus the self-timer will do.
A flash, a ring light and a photo umbrella are optional. If you are not used to them, they spoil the picture more often than they help: you get shiny spots on the forehead and a hard shadow behind the head.
Background: a white or light wall with no pattern
Most authorities want a white or very light background. A typical rule reads like this: the background is plain and even, with no stripes, stains, objects or shadows. Government application portals usually repeat it in simpler words: a white background with nothing else in the frame and no shadows. The U.S. Department of State asks for a plain white or off-white background. Some visa portals word it more loosely and accept a "light, plain" background. The logic is the same everywhere: nothing behind the head except an even, light field.
At home a white or pale beige wall works, as does an interior door, a wardrobe door, or a large sheet of white paper fixed with masking tape. A bed sheet has to be pulled tight, because folds create stripes of shadow. Patterned wallpaper, a rug, tiles with visible joints and a pleated curtain will not work.
You do not have to achieve perfect white, the background can be evened out during processing. But the lighter and smoother the wall is in the original shot, the cleaner the outline of your hair and shoulders will be. A dark wardrobe or busy wallpaper behind you makes the job harder: a ragged edge may remain around the hair.
Do not stand right against the wall. Step half a metre to a metre away from it (2-3 feet). The shadow of your head will then fall down and to the side instead of forming a dark patch behind your ears.
Light: face the window
The window has to be in front of you, not behind you. Stand facing it, about a metre to a metre and a half away, while the person taking the picture stands with their back to the window or slightly to one side. The light will fall on your face evenly, with no dark hollows under the eyes and chin.
The best time is an overcast day or the hours when the sun does not shine straight into the window. If sunlight is coming into the room, draw a sheer curtain or tape a sheet of tracing paper to the glass: hard rays cast sharp shadows from the nose and make you squint, and in the photo your eyes must be open and clearly visible.
Switch off the ceiling light while you shoot. An overhead lamp paints shadows in the eye sockets, and its yellowish tint mixes with daylight, so skin comes out orange in one place and grey in another. In the evening, with lamps only, getting an acceptable shot is much harder: if you have the time, wait for daylight.
How to get rid of shadows and glare
If the window is to one side and one cheek is clearly darker than the other, a simple reflector helps. Ask someone to hold a sheet of white cardboard or poster paper on the dark side, and a white towel on a hanger works too. The shadow under the chin is softened the same way: a white sheet at chest level, just outside the frame.
Shiny spots on the forehead and nose come from the flash and from oily skin. Turn the flash off and blot your face with a tissue. Do not remove shine by retouching: authorities reject photos edited to improve appearance, because the picture must show all the features of your face truthfully.
Clothes and hair
Wear ordinary everyday clothes, but not white: a white shirt will merge with the background and your shoulders will "dissolve". A plain top in a dark or medium tone with a simple neckline works well.
Passport rules often contain direct bans: no uniforms, no outdoor clothing, and no scarf covering part of the chin. Official guides usually add: no hats and no work uniform. Take off your jacket, puffer coat, hood and bulky scarf in any case.
Hair must not cover the eyes, and this too is a standard line in the requirements. Pin back a fringe that falls onto the eyebrows. The whole outline of the face should be visible.
Glasses, contact lenses and head coverings
On glasses, authorities have opposite rules, so this is not something to do out of habit.
- Countries that allow glasses. Some authorities expect people who wear glasses all the time to keep them on. The usual conditions: no tinted lenses, the frame does not cover the eyes, there is no glare on the lenses, and sunglasses are never accepted.
- U.S. documents. Glasses must come off. There is one rare exception: when you cannot remove them for medical reasons.
- Other countries. Read the requirements of the specific authority or consulate: there is no single rule.
To remove glare from the lenses, lower your chin a little or move half a step sideways from the window until its reflection leaves the glass. Keep your head straight while you do it.
Coloured contact lenses that change your natural eye colour are generally not allowed in passport photos. Ordinary clear lenses are invisible in the picture and raise no questions.
A head covering is normally accepted only for people whose religious beliefs do not allow them to appear without it in front of strangers, and only if it does not hide the outline of the face.
How to Shoot: Distance, Camera Settings and Common Mistakes
Who takes the picture: a helper, a tripod or the timer
The best option is to have another person photograph you. They can see the screen, tell you "chin down" or "left shoulder up", and take a dozen frames in a row. Explain in advance what is needed: face and shoulders in the centre, free space above the head, the phone held upright and level.
If you have no helper, put the phone on a tripod or a shelf at face height, turn on the timer, stand on your marked spot and shoot a series. On an iPhone the timer can be set to 3 or 10 seconds, and the shutter also fires from the volume button. On many phones the volume button on wired earphones works the same way, which is easier than running back to the phone every time.
Mark the place where you stand with a piece of tape on the floor. Then the distance and the light will not change from one frame to the next.
Distance and camera height
The main camera of a phone is a wide-angle lens. Up close it enlarges whatever is nearest to it: the nose gets bigger, the ears hide, the face stretches. That is why you need to shoot from a distance: 1.5-2 metres from the lens to the face. The frame will have a lot of spare room around the edges, and that is correct: the excess gets cropped away, while the proportions of the face stay real.
If your phone has a separate lens with 2x or 3x optical zoom, use it from the same two metres. Leave the digital pinch zoom alone: it stretches the image and reduces sharpness.
The camera must be exactly at eye level. A phone held higher enlarges the forehead and hides the chin, a phone held lower shows the nostrils and makes the lower face look heavier. Keep the phone strictly vertical, not tilted forward or back.
You stand straight, shoulders square to the camera, head neither tilted nor turned. The standard requirement sounds like this: full face, looking straight ahead, a neutral expression, mouth closed, eyes open. Look into the lens, not at the screen.
Camera settings on an iPhone
On an iPhone almost everything is already set up the right way, and only a few items are worth checking.
- Photo mode, not Portrait. Portrait mode blurs the background in software and often gets hair and ears wrong.
- The main camera marked 1x, or the 2x-3x telephoto. The 0.5x ultra wide lens is not suitable.
- Flash off, and Live Photo off as well: you need an ordinary single frame.
- Photographic Styles and filters should be reset to Standard so that skin colour does not drift towards a warm or cool tone.
- Grid in the camera settings helps you hold the phone level and place the face in the centre.
- JPEG format. Open Settings, then Camera, then Formats, and choose Most Compatible. Photos are then saved as JPEG. With High Efficiency selected, the iPhone writes pictures in HEIF, and not every website accepts that file.
Before you press the shutter, tap the face on the screen: the camera will focus on it and set the brightness. If the face looks dark, after tapping drag the sun icon next to the box slightly upwards.
Camera settings on Android
On Android the names of the options depend on the manufacturer, but the idea is the same everywhere.
- The normal Photo mode. You do not need Portrait, Beauty or Night modes.
- Turn off face beautification. Different brands call it different things: Beauty, Face retouch, Skin smoothing, Face enhancement. Sometimes it is on by default, especially on the front camera, so check the slider and set it to zero.
- Turn off filters and the AI scene enhancement, if there is such a switch: it adjusts colours as it sees fit.
- Flash off, main camera, no ultra wide lens.
- Leave the aspect ratio at the standard 4:3, which uses the whole sensor.
- Turn on the grid and the timer.
Wipe the lens with a soft cloth. Cloudy, hazy pictures are most often caused by a fingerprint on the camera glass.
What not to do: selfies, filters, portrait mode
Selfies. At arm's length the face is about fifty centimetres (20 inches) from the lens, and a wide-angle lens distorts the proportions. The shoulder of the raised arm goes up, the head tilts, the eyes look at the screen rather than into the lens. On top of that, the front camera may save a mirrored frame and smooth the skin if the settings say so. Most requirements do not ban selfies outright, but meeting "full face, head straight" from your own hand is almost impossible. If nobody can help, set the phone on a support and shoot with the main camera on the timer.
Filters and "enhancers". Smoothed skin, enlarged eyes, a reshaped face and tinting filters make the photo unusable. Passport authorities do not accept pictures edited to improve appearance or for artistic effect. The U.S. Department of State requires that the photo is not enhanced or altered digitally in a way that changes how you look.
Portrait mode. It cuts the person out and blurs everything else. Against a plain wall this brings no benefit, but it does harm: the algorithm "eats" strands of hair, the edge of an ear, the temple of your glasses. Meanwhile the requirements say the face must be in focus from the chin to the hairline and from the nose to the ears.
And briefly about the rest: do not shoot lying down or with the head thrown back, do not shoot against the window, do not photograph an old paper print or a screen, and do not cut yourself out of a group picture from a party.
How to photograph a baby or child
The requirements for a child's photo are the same as for an adult's, and official guides usually say so separately. There are two extra conditions: the child is alone in the frame, and there are no other objects nearby. An adult's hands, a toy, a dummy or the back of a pushchair must not get into the picture.
Photograph an older child the same way as an adult, only lower the camera to the level of their eyes: sit down or kneel. For a baby who cannot sit yet, spread out a white sheet with no folds and shoot from above, holding the phone parallel to the floor so the face is not distorted. The window light should come from the side and slightly from the top of the head, not from behind you, otherwise your shadow will fall on the child.
Shoot in bursts and do not be sparing with frames: with children, one good shot out of twenty is normal. Looking at the camera, open eyes and a closed mouth are needed just as for adults.
How to pick the best frame
Take 10-15 frames and go through them full screen, zooming in on the face. A good frame passes this check:
- eyes open, looking into the lens, no glare on the glasses;
- focus is on the eyes, not on the ears or the wall;
- the head is neither tilted nor turned;
- no dark half on the face, no sharp shadow on the background;
- shoulders and the top of the head fully in the frame, with spare room around the head on all sides;
- a calm expression, mouth closed.
The spare room around the edges matters most of all. If the top of the head touches the edge of the picture or the shoulders are cut off, the frame cannot be fitted to the format: you can crop away the excess, but you cannot draw in what is missing.
Do not want to fiddle with it? Hand the photo to a retoucher
Automation does not fix everything: a difficult frame, a photo that matters, an old print off a scanner. Where the algorithm gives up, a person works the picture layer by layer in Photoshop, by hand.
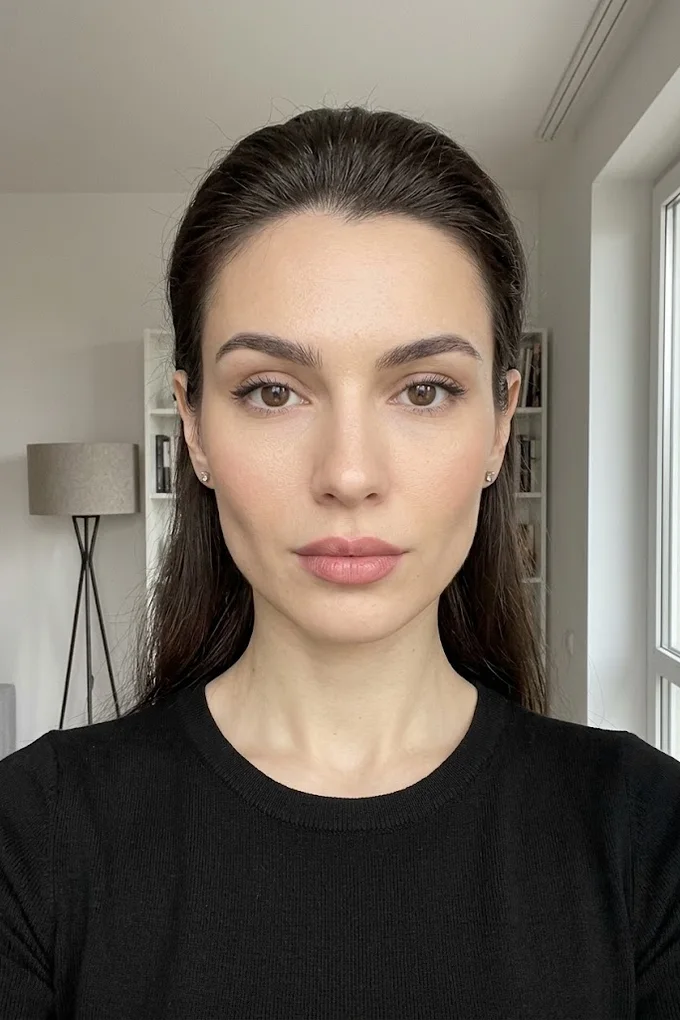
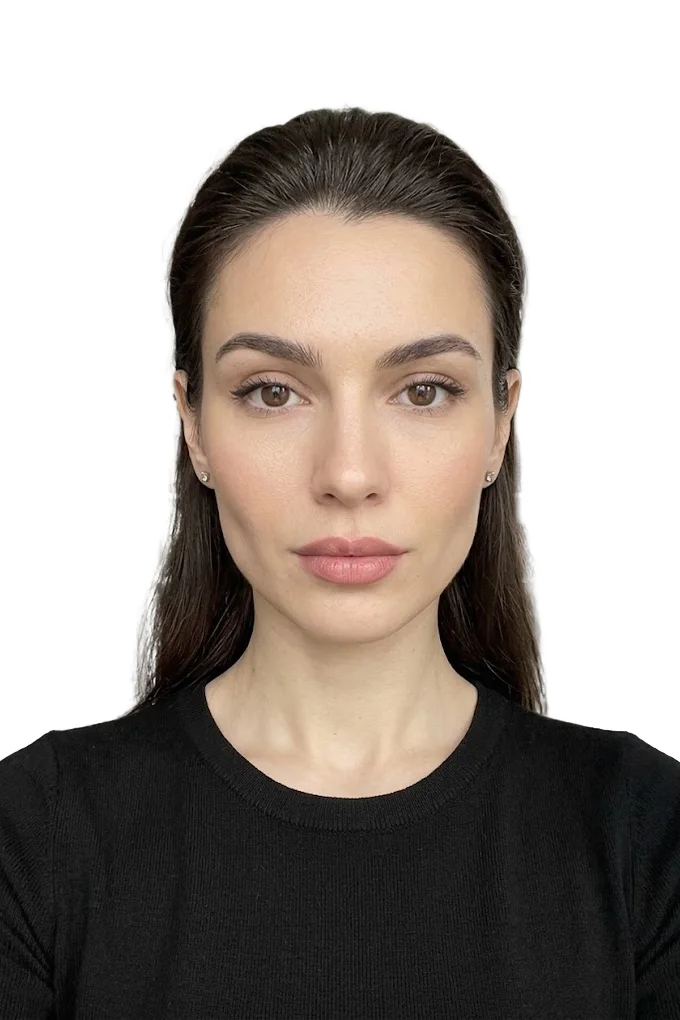 BeforeAfter⇆
- Bring back sharpness in the face and eyes
- Remove noise and artefacts without plasticising the skin
- Fix colour, contrast and a broken exposure
- Remove scratches, stains and creases from an old scan
- Return a file large enough to print
- Price per photo$10
- Turnaroundwithin 24 hours
- Deliveryto your email
- If we cannot do itmoney back
We will finish your photo by hand
A studio retoucher fixes what automation cannot: sharpness, face, colour, defects. Pay first, then simply send the photo and tell us what you need. If we cannot do it, you get your money back.
- Manual photo retouching$10
Passport Photo Requirements, Cropping to Size and the Digital File
First find out where your photo will end up
This determines how strictly the picture will be judged and whether you need prints at all. The details differ from country to country, but the typical situations look like this.
- Online application on a government portal. You upload a file with the application. Read what the portal says about it: in some systems the uploaded photo only stays in your application file, and you are still asked to bring paper prints to the appointment.
- Applying in person or by post. Paper photos are usually required, most often two identical prints. Some documents need an extra one. Where the equipment exists, the office may be able to photograph you on the spot.
- Biometric passport. In many countries you are photographed at the appointment itself, by the officer, together with the rest of the biometric data. Your own paper photo is then not needed, and this applies to children too.
- Older, non-biometric documents and paper forms. These rely on paper photos glued or stapled to the form. The number of prints is stated in the document checklist and can differ for adults and children. Bring them along with the other papers.
- Driving licence. The photo for a national licence is often taken digitally when the licence is issued, and a home picture is not needed. An international driving permit is a different matter: a paper photograph is fixed into it, so check the size and paper type the issuer asks for.
The conclusion is simple: a file for an online application can safely be made at home. Paper prints are worth making at home when the document really is issued from your prints: passports and ID cards in countries that accept them, older-style documents, international driving permits, visas, and all kinds of passes and forms.
What passport offices require of the photo
Besides the background, glasses and clothes discussed above, official specifications contain numbers. It is worth knowing which ones to look for, so you can judge your frame before printing.
- The size of the print. The most widespread format is 35x45 mm, the United States uses 2x2 inches. The photo is normally in colour.
- The frame shows the head and the top of the shoulders.
- The height of the head from the crown to the chin, given in millimetres or as a share of the frame height. It has both an upper and a lower limit.
- The free space above the head: a narrow margin, usually a few millimetres, with a small tolerance.
- The prints are identical and show how you look on the day you apply.
Not every country sets an age limit for the photo in months: some only require that it matches your current appearance. The United States states the limit directly: the photo must have been taken within the last 6 months.
Photo sizes for different documents
The size is set by the authority, not by the photographer. The most popular formats from the tool's catalogue are collected in the table, and the last column shows the file weight the tool compresses the image down to.
| Document | Size, mm | File, pixels | Weight up to, KB |
|---|---|---|---|
| Passport, 35x45 mm format | 35x45 | 600x800 | 500 |
| 3x4 cm photo (pass, ID card, student card) | 30x40 | 600x800 | 500 |
| Schengen visa | 35x45 | 600x800 | 480 |
| U.S. visa, Green Card | 51x51 | 600x600 | 240 |
| China visa | 33x48 | 420x560 | 120 |
| India e-Visa | 50x50 | 900x900 | 1000 |
| Canada, permanent residence | 50x70 | 990x1380 | 4000 |
For the United States the figures match the official ones: the Diversity Visa (Green Card) lottery needs a square JPEG of 600x600 pixels no heavier than 240 KB, with the head taking up 50 to 69 percent of the frame height. The American paper photo is 2x2 inches, which is 51x51 mm.
The catalogue holds 49 formats in total. For passports and visas there are separate pages where the right document is already selected: passport photo and visa photo. The 3x4 cm format has its own line in the catalogue. Keep in mind that 3x4 cm and the 35x45 mm passport format are different sizes, and one cannot replace the other.
How to crop the picture to the format in the tool
Hitting the millimetres and the required share of the head in the frame by hand is difficult. The online passport photo maker does it according to the specification of the document you choose. The steps are as follows:
- Open the tool page in your phone's browser. There is no app to install.
- Tap the upload button and choose the picture from your gallery. JPEG, PNG, WebP, HEIC and AVIF files up to 20 MB are accepted. The second option is to take the picture with the camera right there.
- Choose the document below the picture. The list has a search field, and your choice defines the frame size, the margins and the allowed file weight.
- Look at the frame with its guides: an oval for the face and lines for the crown, eyes and chin. A preliminary check appears here too: whether the resolution is sufficient, whether the head is straight, how white the background is.
- Start the processing.
The output is a frame of the right size: the face is centred, the margins are set, the background is evened out to white, and the file weight is brought within the limit. The "before" and "after" pictures are shown side by side.
The technical limits are these. It works best when the short side of the original is at least 900 pixels, and any modern phone gives several times more. If it is under 600 pixels, the preliminary check flags it as an error. The tool will not accept a file heavier than 20 MB. It tries to convert an iPhone HEIC file by itself, but it is safer to shoot in JPEG from the start, as described above.
What the tool checks and what it does not do
After processing, the line under the result states which document the file was prepared for: the size in millimetres and pixels and the maximum weight. Judge the background yourself from the "after" picture and the preliminary check. If it came out less than perfect, that is a reason to reshoot against a lighter wall rather than hope for luck.
For fine adjustment there is a pro mode: rotation, zoom, brightness, contrast, white balance. Rotation is handy for removing a slight tilt of the head. Be more careful with brightness and colour: fixing a dark frame is fine, "improving" the face is not.
The tool works with the frame, not with the face. It does not remove wrinkles and moles, does not open closed eyes, does not straighten a turned head and does not turn a selfie into a proper portrait. It cannot see a fringe over the eyebrows and does not know that the photo was taken three years ago. And automatic processing gives no guarantee that the document photo will be accepted: the officer at the appointment decides.
Processing and the preview with a watermark are free, the clean file without a watermark is paid. Free processing has a daily limit, so pick your one or two best frames first. If the format you need is not in the catalogue, the frame can be trimmed by hand to the given proportions: how to do it is described in the article how to crop a photo online.
Can you make a passport photo with AI
Generating a portrait with a neural network from a couple of old pictures, or "improving" the face in an app, is not allowed. Such an image shows not you but a plausible person who resembles you: slightly different eyes, a different jawline, perfect skin. The requirements on this point are unambiguous. Passport authorities: the photo must truthfully show all the features of the face, and editing to improve appearance is not permitted. The U.S. Department of State: the photo must not be digitally enhanced or altered in a way that changes your appearance. Even where the rules do not name AI generators separately, the ban covers them.
Technical preparation of the frame is a different thing: finding the face, cropping to the specification, evening out the background. The face itself does not change. Keep in mind, though, that the U.S. requirements are worded strictly, and replacing the background for them is risky. For American documents, get a white wall and even light at the shooting stage, so that processing comes down to cropping.
When you need a digital file
A file is needed for online applications on government portals, e-visas, the Green Card lottery, and forms for a pass or a student card. Each form has its own requirements for it.
On government portals the figures for the file (format, dimensions, weight) are usually shown right in the upload form and may be missing from the general help pages. So do not trust old cheat sheets, read the hint next to the upload button. If an application is returned because of the photo, on many portals it cannot simply be corrected: you fill it in again and upload a new picture. For that case official guides often recommend having the photo taken at a studio and asking for a digital copy. That is a sensible fallback if your home shot was turned down.
If the form says the file is too heavy, it can be compressed further: the methods are collected in the article how to reduce photo file size without losing quality. Send the file to the form straight from the phone's storage, not through a messaging app: messengers compress pictures and change their dimensions.
How Many Photos to Print, How to Make a 4x6 Sheet and Print It
How many photos to print
The number depends on the document, and there is no need to guess it.
- Passport or ID card issued from paper photos: most often two identical prints, whether you apply in person or bring them to an appointment after applying online.
- Older-style documents and paper forms: the checklist may ask for two or three prints, and the number for children can be different.
- International driving permit: paper photos in the size and on the paper type the issuer names.
- U.S. immigrant visa: two identical 2x2 inch photos are brought to the interview.
- Visas of other countries, passes, forms: see the document list of the specific organisation.
One 4x6 inch sheet holds more photos than a single document needs, so you get spares automatically.
Why put the photos on a 4x6 sheet
Nobody prints a single 35x45 mm photo by itself. But every photo lab, print kiosk and home photo printer can print a standard 4x6 inch (10x15 cm) picture. So several identical small photos are laid out on one 4x6 frame, it is printed like an ordinary snapshot and then cut apart.
Up to eight 35x45 mm photos fit on such a sheet: two rows of four, with the sheet placed horizontally. Fewer square 50x50 mm photos fit: two rows of three, with almost no gaps.
How to make the sheet yourself
If what you downloaded from the tool is a single photo for the chosen document rather than a ready print sheet, the sheet takes a couple of minutes to make in any editor or collage app that lets you set the canvas size in pixels.
- Create a canvas of 1800x1200 pixels. That is exactly 4x6 inches (10x15 cm) at a print density of 300 dots per inch.
- Paste the finished photo and give it the size from the specification. At 300 dots per inch a 35x45 mm photo is 413x531 pixels, and a 50x50 mm square is 591x591 pixels.
- Duplicate the photo and arrange the copies in rows with a small white gap, so there is room to cut.
- Save the sheet as a JPEG at maximum quality.
The main thing in step two: do not drag the picture by one edge. If the proportions of the file differ slightly from 35 by 45, do not stretch it, trim the excess in height or width instead. A stretched face is noticeable at once.
If you do not want to bother with a canvas, there is an easier way: many photo shops print document photos from a ready file. Bring the single file and tell them the size in millimetres.
Where to print passport photos from your phone
- A photo lab or photo shop. The file is handed over in whatever way the shop uses: through its website or app, by email, by cable. Say that you need a 4x6 print with no cropping and no auto-correction.
- A self-service print kiosk in a shop or shopping centre. The file is uploaded from the phone, and in the settings you look for the same option: print the whole image, without fitting it to the paper size.
- A home printer. An inkjet with photo paper will do. Plain office paper is unsuitable not only because the picture looks faded: requirements usually expect a proper photographic print on photo-quality paper, and an office sheet is thinner and lighter than that.
Send the file to the shop in its original form. If you forward it through a messaging app as a picture, it gets compressed and loses sharpness. Messengers have a "send as file" or "send as document" option for exactly this purpose.
Print settings that affect the size
Almost all size problems arise at the last step, at the printer. Printing software likes to "help": it stretches the picture to the edges of the paper or shrinks it to leave margins. In both cases the photos on the sheet change size.
- Scale 100 percent, or "actual size". The options "fit to page", "fill" and "fit" are turned off.
- The paper size in the settings matches the sheet: 4x6 inches (10x15 cm).
- Borderless printing on many machines slightly enlarges the picture and cuts off the edges. Ask the shop how their machine treats the frame, or choose printing with borders.
- Automatic colour and contrast enhancement is turned off.
- Print quality is at maximum, and the paper type is set correctly.
At home, make a test print on plain paper first and measure it. Use the photo paper once the size comes out right.
Check with a ruler and cut
Before cutting, put a ruler against one of the photos on the sheet. For the 35x45 mm format three things are checked: the width of 35 mm, the height of 45 mm, and the margin above the crown, which must match your specification within about a millimetre. Then measure from the crown to the chin and compare the result with the head height your authority allows. If the width and height are off by a millimetre or more, reprint at the correct scale.
Cutting is easier with a craft knife along a metal ruler or with a paper trimmer. Scissors work too, but the edge often comes out wavy. Cut along the borders of the frame without leaving a white rim. Give a fresh inkjet print a few minutes to dry.
Do not bend the photos, do not fasten them with a paper clip and do not write on the back with pressure unless you are explicitly asked to.
Matte or glossy, with a corner or without
There is no single answer. Some issuers name the paper outright, for example matte for a particular permit or card. Other specifications say nothing about the surface and only describe the print quality or the thickness of the paper. If the requirements say nothing about the finish, choose matte: it has no glare and does not collect fingerprints.
A corner, meaning a light unprinted area in a lower corner of the photo left for a stamp, is needed for some ID cards and personnel files. Ordinary passport photo requirements do not include it. Whether you need one, on which side and of what size, only the organisation that issues the document can tell you.
When it is better to go to a photo studio
- The document is issued with photography on the spot, as with many biometric passports and national driving licences. Your own paper photo is then not needed.
- There is neither a light wall nor daylight at home, and you have to submit the documents tomorrow morning.
- Your online application has already been returned because of the photo, and you do not want a second attempt with the same result.
- The cost of a mistake is high: a rare consulate appointment, a hard submission deadline.
In all other cases the routine is simple: a window, a light wall, the main camera from two metres, ten frames to choose from, cropping to the format, a 4x6 sheet and a ruler. That way you can prepare photos for the whole family in one evening and not depend on the opening hours of a studio.
Frequently asked questions
Can I take my own passport photo with my phone? Yes. What matters is the result: a white background, even light, full face, the right size (35x45 mm in most countries). With some online applications the uploaded photo only goes into your application file, not onto the passport itself.
Can you wear glasses in a passport photo? It depends on the country. Where glasses are allowed: no tinted lenses, no glare, the frame does not cover the eyes. For U.S. documents glasses must come off. For other countries check with the authority or consulate.
Do I need to bring printed photos for a passport application? For many biometric passports no: you are photographed at the appointment. Older-style documents and paper applications need prints, and the number for adults and children is stated in the document checklist.
Can I use a selfie as a passport photo? Better not. At arm's length the lens distorts proportions, the shoulders are uneven, and the eyes drift to the screen. Put the phone on a support at eye level and shoot with the main camera on the timer.
Is a 3x4 photo the same as a passport photo? No. The common passport format is 35x45 mm. A 3x4 cm photo is asked for passes, ID cards and personnel files. They are shot the same way, only the crop is different.
Can I edit a passport photo with AI? You cannot change the face: authorities reject photos edited to improve appearance, and the U.S. bans any digital change to how you look. Only technical preparation is acceptable: cropping and levelling.
How do I print passport photos from my phone? Make a 4x6 inch (10x15 cm) sheet with several copies (canvas 1800x1200 pixels, a 35x45 mm photo is 413x531 pixels) and print it as an ordinary snapshot. Scale 100 percent, no cropping and no auto-correction.
What should I do if my online application was rejected because of the photo? You will usually have to fill in the application again and upload a new photo. Reshoot with the remarks in mind: white background with no shadows, eyes on the camera, no glare on glasses. The fallback is a studio that gives you a digital copy.
We will edit a sample from your catalog for free
For online stores, manufacturers, brands and wholesale suppliers. Send 1-3 product photos and we will return them professionally edited, with a price quote for your whole catalog.
This is a b2b, volume format. We do not process personal photos (portraits, events, documents) here.
Request received
We will edit your sample and send the result with a catalog quote within one business day.