How to Improve Photo Quality: On Your Phone, Online and With AI
How to Improve Photo Quality: On Your Phone, Online and With AI
What photo quality means and how to tell what your picture is missing
To improve photo quality, first work out what exactly the picture is missing: pixels, sharpness, cleanliness, light or color. Each problem has its own fix. A small image gets upscaled with AI, a blurry one is treated with deblurring, a dark and washed-out one is corrected with the sliders in your phone's gallery. There is no single "make it good" button, but two or three precise steps in the right order are almost always enough.
Below: what photo quality is made of, how to diagnose a picture in a minute, what an iPhone and a Samsung can do without third-party apps, what AI really does to an image, and where the line is beyond which a shot can no longer be saved.
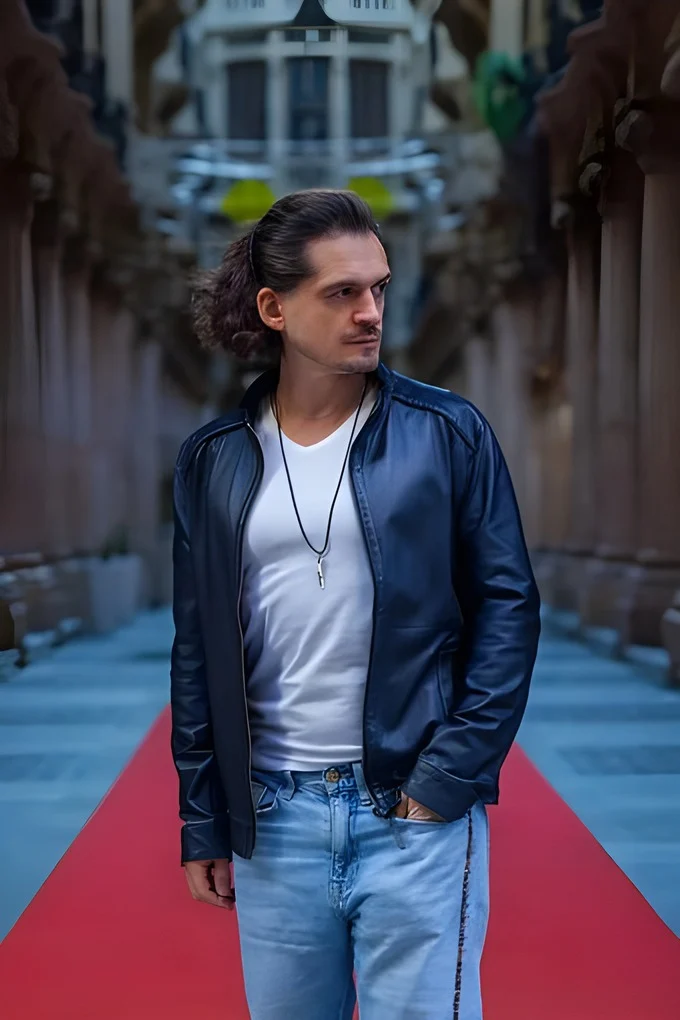
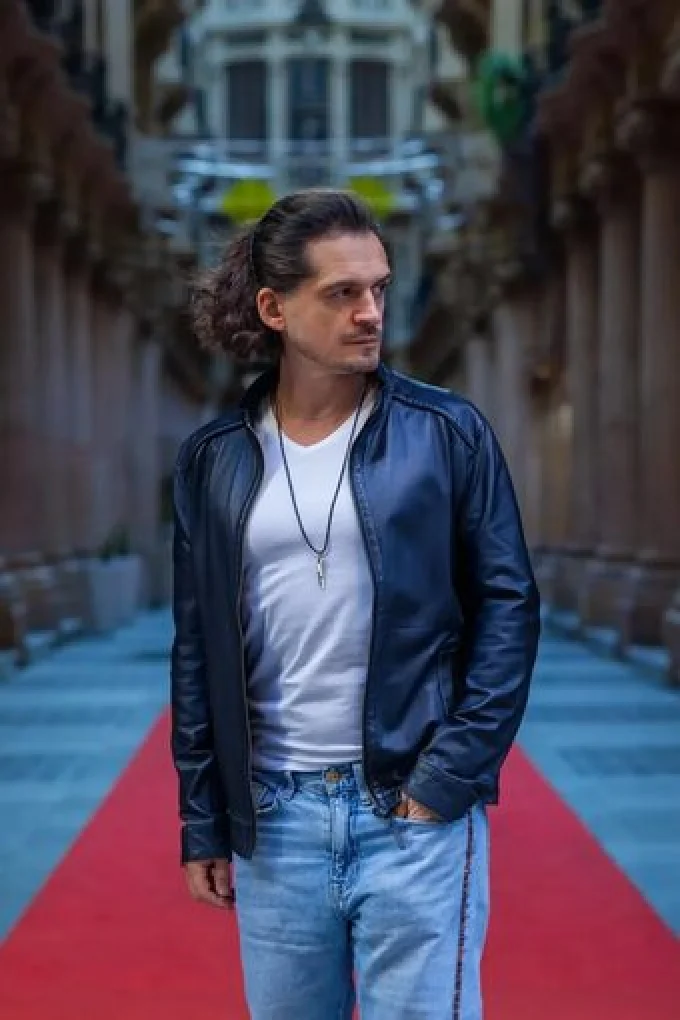
How to improve photo quality: the short answer
Find the very first, original file of the picture and work only with that. A copy from a messaging app, a screenshot or a photo downloaded from social media has already lost some detail, and no amount of editing will bring all of it back.
Then go by the symptom:
- The picture is small and breaks into little squares when you zoom in: it needs AI upscaling.
- The picture is blurry, with doubled or smeared outlines: it needs deblurring, and if it is only slightly soft, a bit of sharpening will do.
- The picture is dark, gray or has a wrong color cast: the editor built into your phone is enough.
- The picture is full of grain and colored specks: it needs noise reduction, and before sharpening, not after.
If there are several problems at once, the order matters more than the set of tools. The last section covers it in detail.
What photo resolution means and when there is not enough of it
Resolution is the number of dots the image is built from: width by height in pixels. The more of them there are, the larger you can display or print the picture before the eye starts to notice individual dots.
You run short of resolution when you try to show a photo larger than it really is. An 800 by 600 image looks great in a chat, but full screen on a large monitor or on a letter-size print it turns soft and jagged. The same goes for heavy cropping: you cut a single face out of a wide shot, and twelve megapixels shrink to a few hundred pixels per side.
Do not confuse resolution with quality in general. A picture that is huge in pixels can be blurred and noisy, while a small one can be perfectly crisp. Pixels only determine how much room you have for size. Checking the size is easy: the file properties on a computer or the photo info in your phone's gallery list the width and height in pixels.
What sharpness is and why a photo looks blurry
Sharpness is how clearly the borders between details are drawn: eyelashes are separate from one another, the letters on a sign are readable, leaves have an edge. Three different causes make a picture blurry, and each is treated differently.
- Missed focus. The camera locked onto the background instead of the face. The background is crisp, the main subject is soft.
- Motion blur. Your hand shook or the person moved. Outlines stretch in one direction and sometimes double.
- Softness from enlarging or compression. The shot itself was sharp, but it was stretched or saved over again.
Slight softness is removed by ordinary sharpening. Real motion blur and missed focus cannot be fixed that way: boosting contrast along the edges just turns mush into higher-contrast mush. This is a job for an AI model trained specifically on blurred shots.
Noise and grain: where the specks in a photo come from
Noise appears when the camera does not get enough light. To keep the picture from coming out black, the phone amplifies the signal from the sensor, and the random ripple is amplified along with it: fine grain and colored specks, especially in the shadows and on plain surfaces.
Modern phones suppress noise on their own, right as the picture is taken. Many people know the side effect: skin and grass turn into a smooth "watercolor" and fine detail disappears. That is a loss of quality too, it just looks different.
Noise is removed with noise reduction, but always at the cost of some detail. So the goal is not to scrub the frame until it looks like plastic, but to find the point where the grain no longer bothers you and the texture is still alive.
Compression: why a photo has blocks and halos
The JPG format makes a file lighter by throwing away what the eye notices least. With moderate compression the losses are invisible. With heavy compression you get square blocks in the sky and on skin, dirty halos around high-contrast edges, and bands instead of smooth gradients.
Repeated compression is the worst. Every time you open a JPG, change something and save it again, the file loses a little more. After a long chain of forwarding and resaving, a good shot turns mushy.
AI upscaling partly smooths over compression artifacts, but it does not bring back the discarded information, it draws something similar in its place. If you need to cut the file size without ruining the image, see our guide on how to reduce photo file size without losing quality.
Color and light: when a photo is dark, gray or yellow
This is the most common problem and the easiest one to fix. Technically the picture is fine, there are enough pixels and everything is sharp, but it is dark, flat or has gone completely yellow under a lamp. The eye reads this as "bad quality", although it is only a matter of settings.
Four things do the work here: exposure (overall brightness), contrast, white balance (a warm or cool tint) and saturation. All of them are in the standard gallery of any phone, and they need neither AI nor a computer.
There is one limit: if the bright areas are blown out to pure white and the shadows have dropped to pure black, there is no detail in them. Darken a white sky and you get a gray sky, not clouds.
How to tell what your picture is missing
Open the photo on the largest screen you have at hand and zoom to one hundred percent, so that one pixel of the picture matches one pixel of the screen. On a small phone screen almost any shot looks decent, so judging it there is pointless.
| What you see | What is wrong | What to do |
|---|---|---|
| Jagged steps and squares when zoomed in, the file is very light | Too few pixels or heavy compression | Look for the original, then upscale with AI |
| Outlines stretch in one direction or double | Motion blur | AI deblurring |
| The background is sharp but the face is soft | Missed focus | Deblurring, a bad miss cannot be saved |
| Everything is slightly soft, with no doubling | Mild softness | Sharpening |
| Grain and colored specks in the shadows | Noise from lack of light | Noise reduction |
| Dark, gray, everything yellow or blue | Exposure and white balance | Sliders in the phone's gallery |
Most often a picture has two problems at once: an evening shot, for example, is both noisy and a little blurred. In that case write both down and treat them one by one, without trying to cover everything with a single filter.
Why a photo from a messaging app looks worse than the original
Messaging apps and social networks shrink and compress pictures on a normal send so that they load faster. The exact rules differ from service to service and change from time to time, but the point is the same: the recipient sees a lightweight copy, not your file.
So the first thing to do before any editing is to ask for the original.
- Telegram. Send the picture as a file, not as a photo: Telegram's own description says that images sent this way go uncompressed, at full resolution.
- WhatsApp. According to the WhatsApp help center, you can choose standard quality or HD when sending, and set HD as the default in the settings, in the storage and data section. HD is crisper than standard, but if you need the actual source file, send the picture as a document.
- Any service. A cloud link, an email attachment or a cable transfer does not touch the file at all.
Taking a screenshot instead of saving is a trap of its own. A screenshot captures the image at screen size, interface included, and usually comes out noticeably smaller than the original frame. If there is a "save" button, use it.
How to improve photo quality on your phone: iPhone and Samsung
The editor built into your phone covers everything related to light and color, and does it fast. What it cannot do is add pixels or cure real motion blur. Let's go through what exactly is available on an iPhone and on a Samsung, and at what point it is time to move on to AI.
How to improve photo quality on your phone: where to start
Start by finding the source file, not with filters. If the photo was taken on your phone, open it in the gallery, not in the chat you sent it to. If the picture was sent to you, ask for the original as a file.
Then take three simple steps, they are the same on any phone:
- Crop out what you do not need and straighten the horizon. A level frame with no clutter at the edges already looks better.
- Tap auto-enhance and see whether it helped. Often that is enough.
- Adjust brightness, shadows and tint by hand if the automatic result missed the mark.
The phone saves edits in a way that lets you go back to the original frame. So experiment freely, but before any serious processing in third-party services keep a copy of the original anyway.
How to improve photo quality on iPhone
On an iPhone everything is done in the Photos app. According to the Apple user guide, the steps are:
- Open the Photos app and tap the picture you want.
- Tap the Edit button, then Adjust.
- Swipe left along the row of icons under the photo: that is where settings such as Exposure, Brilliance and Highlights live.
- Tap an effect and drag the slider. The outline around the icon shows how strongly that setting has been changed.
- Tap Done to save.
The same mode has an Auto enhance button: as Apple describes it, it automatically improves lighting and color. It is handy to start there and then fine-tune individual settings. To compare your edit with the original, tap the photo itself.
If you do not like the result, tap Cancel, then Discard Changes. Edits you have already saved are reversible too: open the edited photo, tap the Edit button and choose Revert to Original. The position of the buttons varies a little from one system version to the next, but the logic and the names of the settings stay the same.
If you have many shots that are equally dark or yellow, do not fix each one by hand. The Apple guide describes how to carry edits over: on the corrected picture choose Copy Edits, then select the other photos and choose Paste Edits.
Which iPhone settings really improve quality
The light settings give you the most, not sharpness. A dark frame in which you have lifted the shadows and pulled the highlights down a touch immediately seems more detailed, although not a single pixel has been added.
- Exposure changes the overall brightness. Move it a little: push it too far and the bright areas burn out.
- Brilliance brightens dark areas and tones down overexposed ones, making the image more even.
- Highlights and Shadows work separately: the first brings texture back to bright zones, the second pulls detail out of the dark.
- Warmth and Tint remove the yellow cast from lamps or the blue of an overcast sky.
The same row has Sharpness and Noise Reduction. Use them carefully and check the result zoomed in: sharpness on a noisy frame emphasizes the grain, and strong noise reduction wipes out skin and hair. This is fine-tuning, not a cure for motion blur.
How to improve photo quality on Samsung in the Gallery
On a Samsung, enhancement is tucked away in the Gallery app. According to Samsung support, the steps are:
- Open the Gallery app and pick a photo.
- Tap the Details icon.
- Look at the block of editing suggestions and tap the one that fits.
The phone analyzes the picture itself and shows only the suggestions that apply to it. Samsung support lists, among others, Remaster, Background blur, Erase reflections, Remove moire, lens distortion correction, and Colorize for black-and-white pictures. Three of them matter for quality: Remaster works on the picture as a whole, Remove moire gets rid of the ripple in photos of screens and fine checks, and Erase reflections helps when you shoot through glass.
If an item is missing, the system found no reason to offer it or the feature is not supported on your model. Samsung states plainly that the look of the menus depends on the One UI version, the model and the region. On older versions of the interface the same feature was found in the three-dot menu on the photo screen, where it was called Remaster picture. If your items are different, open the photo, go into the editor and look for automatic enhancement there.
What Remaster does on Samsung and what to expect from it
As Samsung describes it, this feature improves the resolution, lighting, color and other elements of the picture. In other words it is combined automation: a little sharper, a little brighter, cleaner color.
It does well with pictures that are nearly fine already: an old photo from a previous phone, an image from a chat, an evening shot. You can compare the result with the source before saving, and you do not have to save it.
Do not expect miracles. Samsung itself notes that the outcome and its quality depend on the condition of the source image. The feature will not remove heavy blur, and on very small pictures it can draw unnatural details, especially on faces. Zoom in on the eyes and teeth before you save.
How to improve photo quality on Android phones of other brands
On phones from other manufacturers the logic is the same: open the picture in the stock gallery, enter the editor and find automatic enhancement and the manual light and color settings. Each brand names the items in its own way, so go by the meaning, not the word.
If the stock gallery is bare, the same basic settings are available in any free editor. The main thing is that it saves the result at full size and does not shrink it on export: check the file's pixel dimensions before and after.
What the built-in phone editor cannot do
The phone editor changes what is already in the frame and adds almost nothing. That gives three hard limits:
- It will not add pixels. Sliders will not turn a 640 by 480 picture into a large one. Automation such as Remaster on Samsung raises the resolution on its own, but you cannot choose the factor.
- It will not remove real motion blur. The sharpness setting strengthens the edges that exist. If the edges are smeared by movement, there is nothing to strengthen.
- It will not bring back blown-out detail. A white patch where the sky was and a black one where the suit was will stay patches.
Once you have hit one of these limits, you need different tools: AI upscaling and AI deblurring. They run in the browser, so a computer is not required, everything is done from the same phone.
How to shoot on a phone so there is nothing to fix
The cheapest way to improve quality is not to lose it while shooting. A few habits give more than any editing.
- Wipe the lens. A greasy fingerprint on the glass makes the frame hazy, and editing does not cure that. In its help article on blurry pictures, Samsung puts cleaning fingerprints and dust off the lens at the top of the list and advises checking whether a protective film or glass on the camera is in the way.
- Look for light. Move to a window, turn on a lamp, step out of the shade. The more light there is, the less noise and blur you get.
- Do not use digital zoom unless you have to. Pinching in beyond the camera's optical range is the same as cropping: you end up with fewer pixels. It is better to walk closer.
- Hold the phone with both hands and shoot as you breathe out, especially in the evening. If the camera has a manual mode, shorten the shutter speed: for Pro mode Samsung recommends 1/120 of a second or faster so that movement does not blur.
- Do not hold the phone right up against the subject. Every camera has a minimum focusing distance, and closer than that nothing will be sharp. For small objects switch on macro mode, or step back and crop the frame afterwards.
- Tap the spot on the screen that should be sharp so that the camera focuses exactly there.
And send important shots as a file. Shooting well and then losing half the quality in transit hurts twice as much.
How to improve photo quality online with AI, and what about 4K
AI is needed where sliders are powerless: when there are not enough pixels or the frame is blurred. It does not dig out hidden detail, it draws plausible detail in. In most everyday cases that is enough, but it helps to understand the difference so you do not expect the impossible.
What AI does to a photo and how it differs from plain stretching
Ordinary enlargement simply stretches the image: new dots are inserted between the existing ones, with a color averaged from their neighbors. No new information appears, so the result always looks softer than the source, and the more you stretch, the more obvious the mush.
An AI upscaler works differently. It was trained on a large number of pairs made of a small image and the same image at a large size, and it has learned what eyelashes, fabric, brick and foliage usually look like. When it enlarges your picture it does not average, it predicts which details should be in that spot and draws them.
That is both its strength and its weakness. Edges come out crisp and texture looks real. But this is a reconstruction, not the truth: small lettering that was not visible will not become readable, it will turn into plausible squiggles.
How to improve photo quality online for free
The easiest place to start is the AI image upscaler on this site. It runs in the browser on a phone or a computer, with no software to install.
- Upload the picture: drag the file in or choose it from your gallery.
- Choose the scale: 2x or 4x.
- Choose the mode: Universal or Fast.
- Press Upscale and wait for the result.
The tool accepts JPG, PNG and WebP files up to 25 MB, with a side of no less than 100 and no more than 8000 pixels. The result is delivered as a JPG. iPhone pictures in HEIC format have to be saved as JPG first.
The main limit worth knowing in advance: no more than 2000 pixels on the long side go into processing. A larger picture is automatically reduced to that size before it is processed. So the result is never larger than 4000 pixels on the long side at 2x and never larger than 8000 at 4x.
Do not want to fiddle with it? Hand the photo to a retoucher
Automation does not fix everything: a difficult frame, a photo that matters, an old print off a scanner. Where the algorithm gives up, a person works the picture layer by layer in Photoshop, by hand.
BeforeAfter⇆- Bring back sharpness in the face and eyes
- Remove noise and artefacts without plasticising the skin
- Fix colour, contrast and a broken exposure
- Remove scratches, stains and creases from an old scan
- Return a file large enough to print
- Price per photo$10
- Turnaroundwithin 24 hours
- Deliveryto your email
- If we cannot do itmoney back
We will finish your photo by hand
A studio retoucher fixes what automation cannot: sharpness, face, colour, defects. Pay first, then simply send the photo and tell us what you need. If we cannot do it, you get your money back.
- Manual photo retouching$10
Upscale a photo without losing quality
AI upscaling runs locally on our own hardware. It restores sharpness to blurry shots and raises the resolution of small sources. Output is a JPG.
A harder case? Manual retouching
AI handles most photos, but on heavily damaged shots a human hand delivers a result no model can match. The gdefoto team restores photos from $10 per shot.
Order manual retouchingNote that the photo is sent to a server: the model is too heavy to run inside a phone browser. Keep that in mind if the picture shows something private or contains documents.
Mode and scale: what to choose when upscaling
For photographs choose Universal: it is the heavier model, it is selected by default and it is more careful with skin, fabric, foliage and other complex textures. Fast mode runs on a lighter model: the result arrives sooner, but on complex texture it falls behind. It makes sense for simple images: screenshots, diagrams, pictures with flat fills.
The rule for scale is this: take the smallest one that is enough for your purpose. 2x upscaling almost always looks natural. 4x is needed only for very small sources, and the drawn-in detail is more noticeable there.
Because of the 2000-pixel input limit, the scale should be counted from that figure. A 1000 by 750 picture becomes 2000 by 1500 at 2x and 4000 by 3000 at 4x. An ordinary phone shot of 4000 by 3000, however, is first reduced to 2000 by 1500, and 2x upscaling returns the same 4000 by 3000: no pixels are added. For a picture like that only 4x makes sense, it gives 8000 by 6000. The tool is designed first of all for small sources.
Work out in advance what size you need. For a phone screen and social media a couple of thousand pixels on the long side is enough. A letter-size print needs more. There is no point in pushing a picture to the maximum size "just in case": the file gets heavy and no real detail is added.
Can you improve photo quality to 4K
You can, but 4K is only a size in pixels, not a level of quality. 4K usually means an image of 3840 by 2160 pixels. Getting a file of that size is easy, the question is what ends up inside it.
The arithmetic is simple. To reach 4K with 2x upscaling, the source has to be about 1920 by 1080. For 4x upscaling 960 by 540 is enough. If your picture is that size and sharp as well, the result will be good: you can show it on a big TV or monitor without embarrassment. Phone photos usually have different proportions from a 16 by 9 screen, so for a TV the frame has to be cropped at the top and bottom. Crop before you upscale.
If the picture is sharp and already close to 4K in size, there is no reason to upscale it: what you need is not pixels but light, color or sharpness.
What happens if you enlarge a small picture several times over
You get a large image in which almost everything is invented. Picture a face that takes up 40 by 40 pixels in the source. An eye there is three or four dark pixels. At 4x the model has to draw an eye in that spot, with eyelids, lashes and a catchlight, and it will, but it will be an average eye from its experience, not the eye of the person you know.
That is why small faces give a familiar feeling after heavy upscaling: it looks sharp, but the person does not look like themselves. Text behaves the same way: letters become crisp symbols with no meaning. Textures are easier: grass, sky and brick look convincing because it does not matter which blade of grass grows where.
Upscaling something that has already been upscaled is a bad idea too. The second pass works not with the original information but with the guesses of the first, and the errors pile up. Patterns become too regular, skin turns waxy. In this tool a second pass will also run into the 2000-pixel input limit: the enlarged picture will be reduced first. If 4x was not enough, the source is too small for the job.
How AI removes blur and when you need it instead of upscaling
If the picture is large enough but blurred, upscaling will not help it: you will get a large blurred picture. This calls for a different tool, Unblur image. It uses a model trained on frames blurred by motion: a shaky hand, a person who moved. It pulls the stretched outlines back together and restores crisp edges. The picture does not grow in size, and a frame larger than 2048 pixels on the long side is reduced to that size before processing.
The tool has no settings: the model judges the type and strength of the blur by itself. There are no brightness or color sliders in the result window either, so the light and color of a blurred frame are corrected separately, in your phone's gallery.
The method has its own limit. Light and medium motion blur is removed well. Missed focus is corrected noticeably worse: the model was trained on motion blur, not on defocus. With heavy blur, when the outlines are stretched across a third of the face, there will be no miracle: the image will stay soft or get covered in ripples and double contours. This tool does not redraw the face, which is a plus for likeness but a minus for hopeless shots.
And if the frame is not blurred but just slightly soft, for example after downsizing, a heavy model is not needed. Ordinary sharpening is enough: three preset strength levels and manual adjustment. It is a classic unsharp mask, and the sharpening is applied to brightness, with no colored fringes along the edges. It draws nothing in, it only emphasizes the edges that exist, so it is safe for faces.
AI noise reduction: what it does to grain
AI noise reduction tells random ripple from real texture better than classic filters do. A simple filter blurs everything small, and skin pores and fine hairs go out along with the grain. A trained model tries to keep what looks like detail and remove what looks like noise. The upscaling tool has no separate noise reduction button: grain is smoothed along the way, during the upscaling itself.
It does not work perfectly. On very noisy night shots the model cannot tell one from the other and either leaves the dirt in or draws a smooth surface with an invented pattern. The darker the frame was, the more imagination there is in the result.
The practical takeaway: light grain is often better left alone. On a small print and on a phone screen fine noise is almost invisible. Suppress only what really gets in the way of looking at the picture, and do it in the phone's editor or in desktop software before upscaling.
Improve photo quality with no sign-up: what is free and what is not
Processing and the preview of the result are free here and need no sign-up: no email and no account login is required to upload a picture. You see what came out and decide whether the result suits you. The clean file without a watermark is paid.
This arrangement is convenient because you are not paying blind. A model behaves differently on different pictures, and there is no way to guess in advance whether it will pull your particular shot through.
There are five free runs per day from one address, and the count is shared between upscaling, deblurring and the other AI tools on the site. The preview is reduced to 900 pixels on the long side, so fine detail is hard to judge from it.
Where AI gets it wrong: faces, text and patterns
Before you save, check the result zoomed in at three places.
- Faces. Eyes, teeth and the hairline. If the person no longer looks like themselves, lower the scale or keep the source.
- Text and numbers. Plates, signs, captions. Crisp large text survives, small and handwritten text can drift or change. A "restored" inscription cannot be trusted.
- Regular patterns. A checked shirt, brickwork, grilles. The model sometimes "repairs" them, making them more even than they were, or mixes up the direction of the lines.
For the same reason an AI-upscaled picture is no good as proof of anything: what became visible in it may have been drawn in. For a family album, prints and social media that is not a problem, for disputes it is a serious one.
Editing order, Photoshop and when quality can no longer be saved
The same steps in a different order give a different result. Sharpening applied before upscaling turns into halos. Noise left in before sharpening becomes twice as noticeable. Below is an order that works on both a phone and a computer, and an honest list of cases where it is better to stop.
In what order to improve photo quality
Go from coarse to fine: first what changes the material of the picture itself, then what changes how it looks.
- Find the best source. The original from the phone or camera, not a copy from a chat.
- Crop and straighten. There is no reason to process what will be cropped away anyway.
- Remove blur, if there is any. This is done at the original size.
- Remove noise, if it gets in the way. Before sharpening, otherwise the grain will be emphasized.
- Upscale, if there are not enough pixels. A small picture has no need to go through deblurring "just to be safe": an extra step is an extra resave.
- Fix light and color: exposure, shadows, white balance.
- Add sharpening at the very end, and only a little.
- Save once, at good quality.
Not every picture needs every step. A dark but sharp frame only needs the sixth. A small but clean image only needs the fifth. The list is there so you do not mix up the sequence when there are several steps.
Why you should not start with sharpening
Sharpening works in a simple way: it finds the border between light and dark and makes the light side a little lighter and the dark side a little darker. The border looks more contrasty, and the eye reads that as crispness.
If you upscale the picture after that, the thin light and dark fringes around the outlines grow with it and turn into visible halos. If you brighten the shadows after that, out comes the noise that sharpening has already emphasized. So its place is last, when size and light are final.
One more thing: sharpening is matched to the final size. A small image for social media needs a bit more of it, a large print needs less. Judge it at the scale at which the picture will be viewed.
How to improve photo quality in Photoshop
In Photoshop the order is the same, only the tools change. Upscaling is done in the image size dialog (Image, then Image Size). Turn on the Resample checkbox and choose a method: for enlargement Adobe recommends Preserve Details 2.0, the option in the list that carries the 2.0 label. According to Adobe's documentation it keeps crisp edges and fine detail with fewer artifacts, and it has a noise reduction slider so that grain does not grow along with the picture.
The second route is the Enhance feature with Super Resolution in Adobe Camera Raw. According to Adobe's documentation it doubles the width and height of the picture, which means four times as many pixels, and it works not only with RAW files but also with JPEG and TIFF. You call it up like this: right-click the picture in the Camera Raw window, choose Enhance, then Super Resolution.
There is a catch here that trips many people up. Photoshop's Filter menu has Camera Raw Filter, but Super Resolution is not in it: Adobe states plainly that the filter works on a single layer and does not include features that change document properties. The file has to be opened in Camera Raw itself. RAW pictures open there on their own, and for JPEG and TIFF you go to the Camera Raw preferences, to the File Handling section, and turn on automatic opening of supported files in those formats.
The same Enhance window has AI Denoise, but according to Adobe's documentation it is meant for RAW files. For JPEG you are left with the ordinary noise reduction sliders. Sharpening in Photoshop is done with the Smart Sharpen and Unsharp Mask filters. The names of the items depend on the version of the program, so check the help pages for your version. A detailed walk-through of the techniques is in the article on sharpening in Photoshop and enlarging a picture.
What to choose: Photoshop, your phone or an online AI tool
Choose by the task, not by the prestige of the tool.
- Your phone fits when the trouble is light and color. It is a minute of work.
- An online AI tool fits when you need to upscale a picture or remove blur and have no time to learn software. You see the result right away.
- Photoshop is justified when you need precise local work: sharpening on the eyes only, noise reduction in the shadows only, manual cleanup of defects. It takes a subscription and skill.
You can also combine them: upscale online, then fix light and color in your phone's gallery. The main thing is not to run the file through five services in a row: every resave as JPG costs a little quality.
How to save a photo without losing quality
Save the result once and at high quality. If the editor asks for a JPG compression level, set it close to the maximum. The difference in file size is small, and there will be no blocks.
Do not overwrite the source. Save the edited picture next to it under a different name: a year from now you may want to process it again, and that should be done from the original, not from the result.
If you plan to carry on working later, it is better to keep intermediate versions in a lossless format such as PNG and convert only the final one to JPG. The upscaling result on this site comes as a JPG; if you go on to edit it in an editor, save the final version once. And remember about sending: put the file into a messaging app as a document, otherwise the service will compress everything you have just improved.
When photo quality can no longer be saved
There are cases where the honest answer is: it cannot be done. Processing will give you an image that looks better, but it will no longer be your picture.
- Heavy blur. The outlines are stretched so far that facial features cannot be made out. Deblurring will leave mush, and a generative model will draw a face, but someone else's.
- A gross focus miss. The subject has turned into a soft blob. The shape will remain, the details will be invented.
- A tiny source. A face a few dozen pixels across. Upscaling will give a crisp mask with no likeness.
- Blown highlights and crushed shadows. Pure white and pure black hold no information, there is nothing to restore from.
- Repeated compression. A picture that has been forwarded a dozen times is made of blocks. They can be smoothed, but there is no detail underneath.
- Unreadable text. If you cannot make out a number or an inscription by eye when zoomed in, the model will not read it, it will make it up.
There is one sign that you are at the limit: after processing it got sharper but stopped looking like the real thing. At that point it is better to step back and leave the picture a little soft but genuine.
What to do if the picture matters and AI could not handle it
First, look for the source once more. It often turns out that the original is sitting in the cloud, on an old phone, with the person who took it, or in an email attachment. One original found gives you more than an hour of processing a copy.
Look for neighboring frames. Phones often shoot a burst, and a good frame may be sitting right next to the failed one. If it was a Live Photo, there are other moments inside it from which you can pick a sharper one.
If the picture is one of a kind and precious, an old family photograph for example, what remains is manual retouching: a specialist restores the detail, checking against other pictures of the same person. For paper prints and scans there is a separate guide on how to improve the quality of an old photo.
Checklist: how to improve photo quality in five minutes
The whole route in brief, suitable for most pictures.
- Find the original. Not a screenshot and not a copy from a chat.
- Look at it on a large screen at one hundred percent and name the problem: too few pixels, blur, noise or light.
- Fix light and color in your phone's gallery: auto-enhance, then shadows and tint.
- Remove blur with deblurring, and make up for a lack of size by upscaling 2x or 4x.
- Check faces and text zoomed in. If it does not look like the person, go back a step.
- Save once at high quality, do not delete the source, send it as a file.
If after all the steps the picture is better but not perfect, that is normal. The goal of editing is not to turn a phone into a studio camera, but to remove what gets in the way of looking at the shot.
Frequently asked questions
Can you improve photo quality for free? Yes. Light and color can be fixed for free in your phone's standard gallery. In the online upscaling tool, processing and the preview are free, and only the clean file without a watermark is paid.
How do I improve photo quality on iPhone without apps? Open the picture in the Photos app, tap Edit and then Adjust. Try Auto enhance, then tweak Exposure, Brilliance and Highlights. Revert to Original undoes an edit you do not like. The built-in editor cannot add pixels or remove heavy blur.
How do I improve photo quality on Samsung in the Gallery? Open the photo in Gallery and tap the Details icon. The phone will show editing suggestions, and Remaster is sometimes among them. The set of items depends on the model and the One UI version.
Is it true that AI can enhance a photo to 4K? It can produce a file of 4K size, but that is a size, not a guarantee of quality. From a sharp picture of about 1920 by 1080, 2x upscaling gives exactly 3840 by 2160, and the result will be good. A tiny image will turn into a large file with invented detail.
Why is AI upscaling better than ordinary resizing? Ordinary resizing stretches the image and makes it softer. AI draws in plausible detail, so edges and texture look crisp. But it is a reconstruction: small faces and text can change.
What comes first: noise reduction or sharpening? Noise first, then sharpening. Otherwise sharpening emphasizes the grain and it becomes harder to remove. Sharpening is always applied last, when size and light are final.
Which files does the image upscaler accept? JPG, PNG and WebP up to 25 MB, with a side from 100 to 8000 pixels. A picture larger than 2000 pixels on the long side is reduced to 2000 before processing. The scale is 2x or 4x and the result is a JPG. Processing runs on a server.
Can you restore a photo compressed by a messaging app? Partly. AI will smooth the blocks and halos, but it will not bring back the detail thrown away during compression, it will draw something similar. It is more reliable to ask the sender for the original as a file.
We will edit a sample from your catalog for free
For online stores, manufacturers, brands and wholesale suppliers. Send 1-3 product photos and we will return them professionally edited, with a price quote for your whole catalog.
This is a b2b, volume format. We do not process personal photos (portraits, events, documents) here.
Request received
We will edit your sample and send the result with a catalog quote within one business day.